
Disclosure: This post contains affiliate links. If you buy through them, we may earn a commission at no extra cost to you. We only recommend storage we’d use in a normal-sized home — and every product suggestion here comes with the dimensions to check before you buy.
The Short Answer
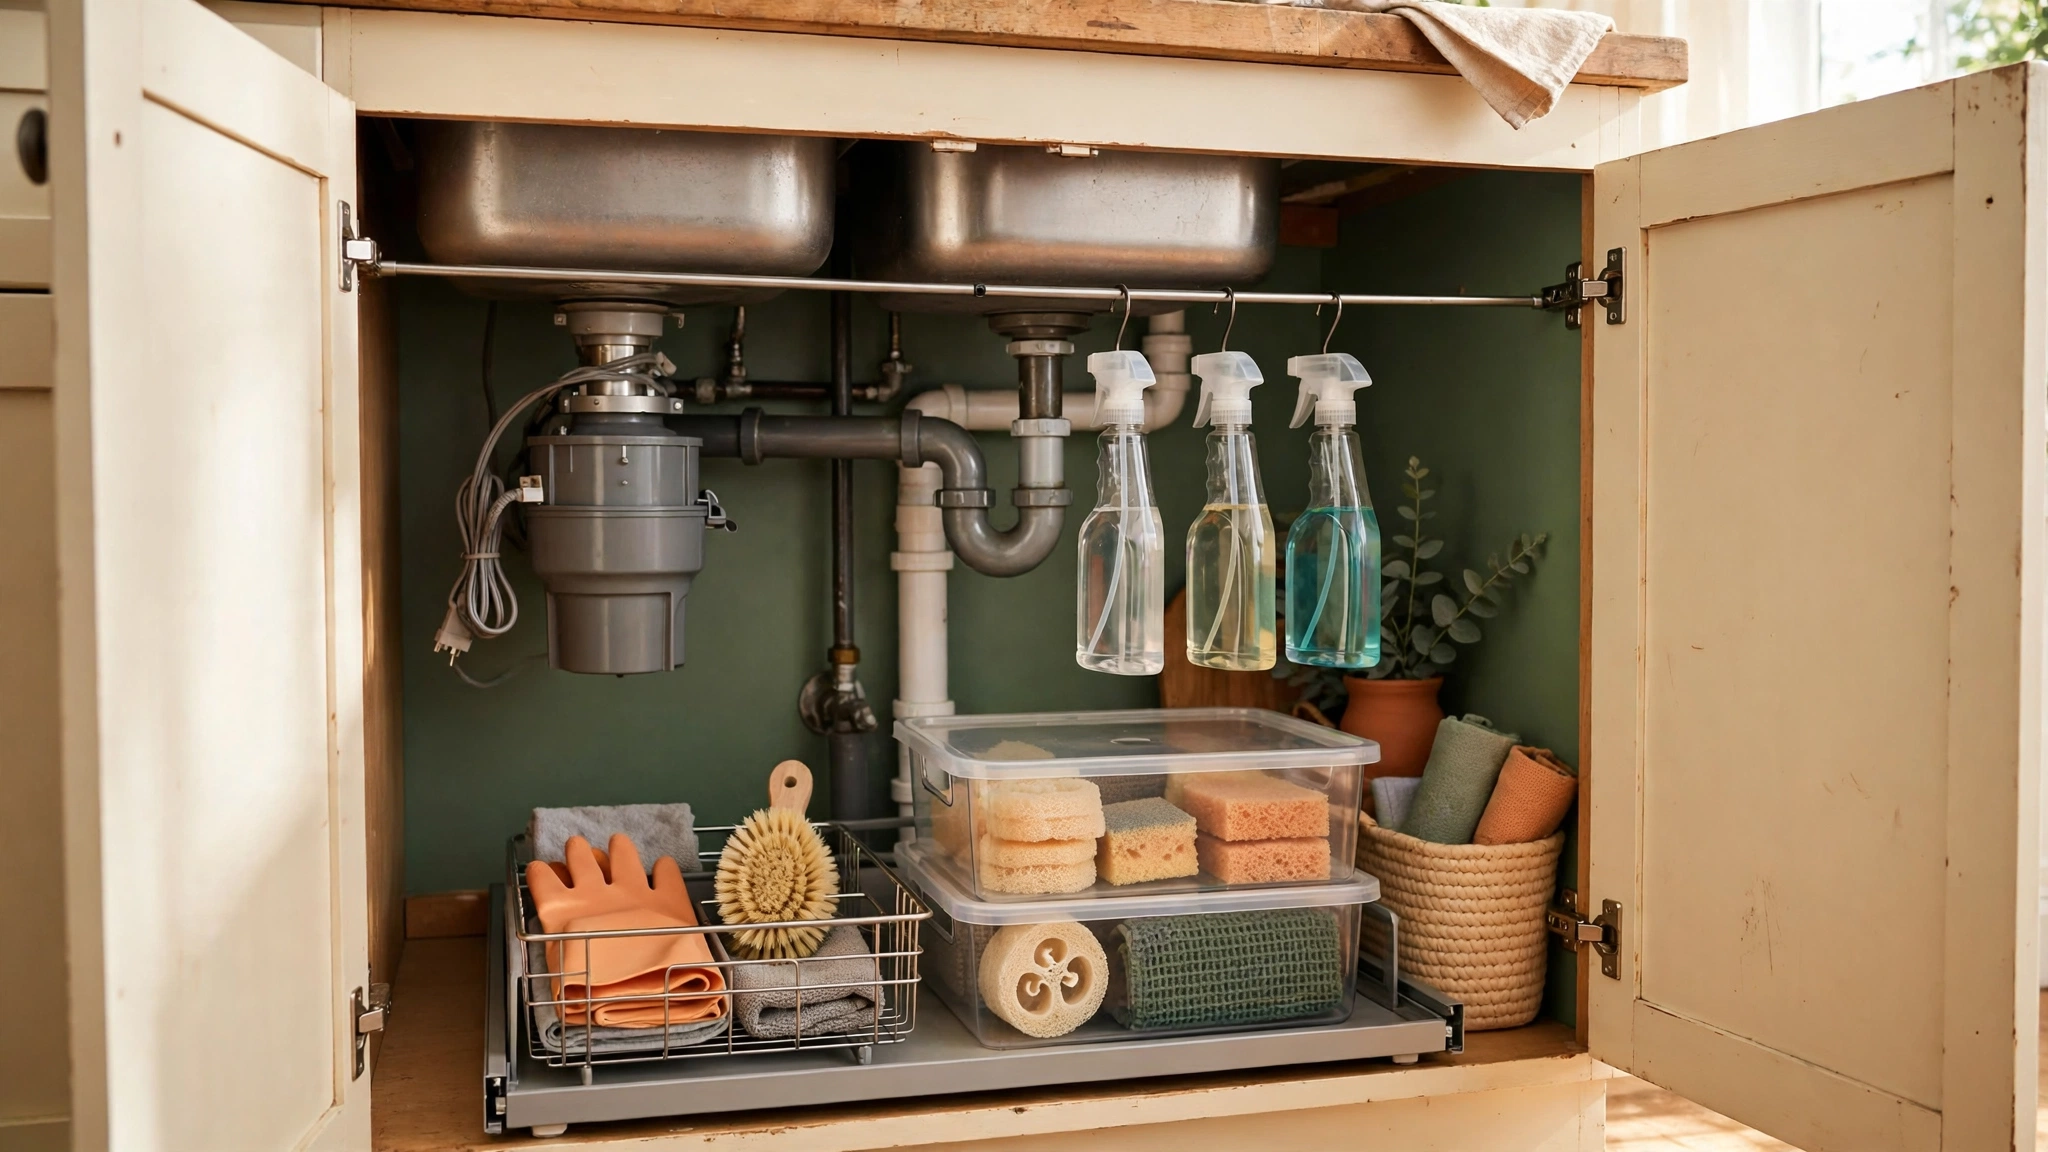
To organize under your kitchen sink, stop treating it like a normal cabinet — the pipes and garbage disposal eat the middle. Measure the clear space on each side of the plumbing first, then split what’s left into five zones: daily sprays, wash and scrub tools, trash and recycling bags, refills and backstock, and safety-locked items. Use narrow bins and a sliding caddy sized to the gaps beside the pipes, hang spray bottles from a tension rod, and keep the center low and clear so you can spot leaks and reach the shut-off valves.
The Hardest Cabinet in the House
Every kitchen has one cabinet that defeats people, and it’s almost always this one.
It’s not your fault. A normal cabinet is an empty box. This one has a sink basin dropping into the top, a garbage disposal hanging in the middle, supply lines, a drain trap shaped like a hook, and often a filter or dishwasher line joining the party. The usable space is two odd side pockets and a shallow strip in front of the pipes — that’s it.
The fix isn’t more bins. It’s measuring the space the plumbing leaves you, and giving the five things that live down there five actual homes.
Step 1: Empty It, Wipe It, Look at the Plumbing
Pull everything out — including the bottle from 2019 with the label worn off. While it’s empty, do three things most people skip:
- Wipe the cabinet floor and look at it. Water stains, warping, or a soft spot mean a slow leak — past or present. Learn that today, not after loading organizers on top of it.
- Run the water, then the disposal, and feel the trap and supply-line joints with a dry hand or paper towel. Any dampness? Fix the leak before you organize — organizing around a drip gives you organized mold.
- Find your shut-off valves. Nothing in the finished system should block them — in a leak emergency, you don’t want to be unloading bins to reach them.
Now sort the pile into the five zones from Step 3, plus a “doesn’t belong here” pile — usually bigger than people expect.
Step 2: Measure Around the Plumbing (This Is the Whole Game)
Standard sink base cabinets are 24″ deep and about 36″ wide (30″ and 33″ are common too), with roughly 28–30″ of height inside — but the basin and disposal claim most of the upper middle. What you actually own is the space around them. Measure yours:
The Under-Sink Measure-First Checklist
| Measure this | How to do it | Why it matters |
|---|---|---|
| Cabinet width and depth | Inside, wall to wall; front frame to back wall | Most organizers assume a 24″-deep cabinet — verify yours. |
| Usable height on each side | Floor to the underside of the sink basin, left and right of the disposal | The two sides often differ. Stackable bins must clear the lower side. |
| Disposal footprint | Width of the disposal body, and how far it hangs down | Sets the gap beside it. Sliding caddies need an 11–13″ clear lane. |
| Trap position | How far the P-trap juts toward the doors, and its lowest point | Anything tall in the front-center hits it. This is your “keep low” zone. |
| Door opening width | The frame opening, not the door itself | Pull-outs must be narrower than the opening, not the cabinet. The #1 fit failure. |
| Door inside depth | Door thickness and hinge clearance, if you’ll mount anything on the door | Door holders add 3–5″ of depth and must clear the trap when the door closes. |
Typical result: two side pockets roughly 10–14″ wide and 14–18″ tall, plus a front strip about 8–10″ tall under the trap. Write the numbers in your phone; every product below lists what to check against them.
Step 3: Set Up the 5 Zones
Zone 1: Daily Sprays (front, dominant-hand side)
Dish soap, counter spray, glass cleaner — the bottles you grab daily, often with wet hands. They belong at the front on whichever side you naturally reach with your main hand.
What works here: a narrow open bin or caddy, about 10–12″ wide, that keeps bottles upright. Even better: hang the spray bottles from a tension rod across the top of the cabinet (Step 4) and free the floor entirely.
narrow under sink caddy bin
cabinet tension rod, adjustable
Why: loose sprays are this cabinet’s dominoes — one falls, takes three with it, and leaks on everything. Upright and grouped, they stop wandering.
Zone 2: Wash and Scrub Tools (on the door or the front edge)
Sponges, brushes, scrub pads, rubber gloves. Small items, used constantly, always damp.
What works here: a door-mounted holder or over-cabinet-door basket at the front — typically 8–12″ wide and 3–4″ deep. Confirm it clears the trap when the door closes. Gloves can drape over the tension rod, where they actually dry.
over cabinet door organizer basket
sponge and brush holder for cabinet door
Why: damp tools in the dark back corner are where the under-sink smell comes from. Front and ventilated beats deep and forgotten.
Zone 3: Trash and Recycling Bags (one side, flat and boring)
Trash bags, recycling bags, compost liners. Flat, light, used one at a time — they don’t deserve prime front space, but they do deserve a place.
What works here: lay the rolls flat along one side wall, stand them in a slim bin about 5–6″ wide, or use a wall/door-mounted bag dispenser so rolls stop unspooling into the cabinet.
grocery bag holder dispenser
Why: bags are the classic “tossed anywhere” item that slowly fills every gap. Flat against a wall, they take almost no room and stop migrating.
Zone 4: Refills and Backstock (the back, in one bin)
The second bottle of dish soap, bulk dishwasher tabs, the refill jug, spare sponges. Duplicates only — nothing used daily lives back here.
What works here: one stackable bin at the back of the taller side. Standard stackable under-sink bins run about 14″ long × 8″ wide × 6–7″ tall per tier — measure your side-pocket height and do the math for two. Clear or open-front styles beat solid ones: backstock you can’t see gets rebought.
stackable under sink bins, 2 tier
Why: backstock in a bin is inventory. Backstock scattered behind the pipes is a future discovery of three half-used bottles of the same cleaner.
Zone 5: Safety-Locked Items (up high or latched, always)
Drain cleaner, oven cleaner, anything with skull-and-crossbones energy — especially if kids or grandkids are ever in your kitchen. These don’t get a casual bin.
What works here: a bin with a locking lid, on the highest spot your cabinet offers. With young children in the house, be honest: the real answer may be a latched or high cabinet instead. This is the one zone where “move it out” is a legitimate system.
locking storage bin for chemicals
Why: under-sink is the classic under-five reach zone, and it’s where the strongest chemicals traditionally live. Zones 1–4 make life easier; this one prevents a bad day.
Step 4: Storage That Works Around Pipes (and What Doesn’t)
Four solutions earn their keep down here:
- Sliding caddies / pull-out frames. A caddy roughly 12″ wide × 18″ deep that slides toward you beats reaching past the trap. It must be narrower than your door opening, with a clear lane beside the disposal. Gap under 11″? Use a handled bin instead.
- Stackable bins on one side only. Stack where there’s more height. Stacking in the middle collides with the disposal every time.
- A tension rod across the top. Spray bottles hang by their triggers, gloves drape to dry, the floor stays clear. Most cabinets fit a 17–28″ adjustable rod — buy the range that brackets your inside width.
- Door-mounted holders. Great for Zone 2 tools and bag rolls, but they add depth — dry-fit before you commit. If the door won’t close cleanly, the holder loses.
One popular solution to be careful with: the lazy Susan. Wonderful in pantries; under a sink, the round footprint wastes corners, bottles tip toward the pipes, and nothing stacks. In a wide (36″+) cabinet with a shallow trap, a small one can work on a side. In most cabinets, a rectangular caddy wins.
Step 5: The Moisture and Leak Watch
This is the only cabinet with water running through it, so the system includes a two-minute habit:
- Line the floor. A waterproof under-sink mat (common sizes: 30″ × 24″ and 36″ × 24″) catches drips before they soak the floor. A low lip buys you time when a bottle leaks.
- Feel the pipes monthly. Grabbing a refill? Run a dry hand along the trap joints. Damp means a slow leak starting — cheap now, expensive later.
- Ventilate after a spill. Doors open for an hour after any leak. Trapped damp is the whole under-sink smell problem in one sentence.
waterproof under sink mat
What Does NOT Belong Under the Sink
Part of fixing this cabinet is eviction. These move out today:
- Anything paper or cardboard — paper towels, food boxes, manuals. Water finds them first; they hide leaks and feed mold.
- Food, full stop. Not the potatoes, not the onions — it’s dark, damp, and shared with chemicals.
- Small appliances — cords and motors don’t belong next to a drain trap.
- Tools and hardware overflow — give the screwdriver-and-tape pile a real home elsewhere.
- “Someday” chemicals. The specialty cleaner for a surface you no longer own. Unused for a year? Dispose of it per local hazardous-waste rules.
Every eviction is square inches back for the five zones — and in this cabinet, square inches are the whole budget.
Common Mistakes That Keep This Cabinet Broken
Buying a standard cabinet organizer. Most are designed for an empty box: full width, full height, no pipes. Under a sink they collide with the trap or disposal and end up donated. Measure the gaps first (Step 2), buy for the gaps.
Blocking the shut-off valves. A bin parked in front of the water shut-offs adds minutes to the moment you can least afford them. Keep the center low and the path clear.
Storing sprays loose. Bottles on their own tip, leak, and roll behind the trap. Every spray gets a bin, a caddy, or the tension rod.
FAQ
How do I organize under the sink with a garbage disposal?
Don’t fight the middle — use the two side pockets. Stackable bins on the taller side, a caddy on the other, and keep the strip in front of the disposal low and clear. Measure the lane beside the disposal first (most pull-out caddies need roughly 11–13″).
What size organizer fits under a kitchen sink?
There’s no standard, because the plumbing decides. Cabinets are usually 24″ deep and 30–36″ wide, but usable side pockets are often only 10–14″ wide and 14–18″ tall. Narrow bins around 14″ × 8″ and caddies around 12″ × 18″ fit most setups — after measuring yours.
How do I keep the under-sink cabinet from smelling?
Dry is the whole secret. Damp tools at the front or on the door, a waterproof mat on the floor, trap joints checked monthly, and no paper or cardboard. A persistent smell with no visible leak usually means moisture trapped in the cabinet floor — dry it out with the doors open.
Where should I store cleaning chemicals if I have small kids?
Not loose under the sink — it’s the easiest cabinet for a toddler to open. Harsh products go in a locking-lid bin at minimum; a high or latched cabinet is better. Under-sink keeps the mild daily sprays.
Start With Five Zones, Not Five Purchases
This system doesn’t start with shopping. It starts with an empty cabinet, a tape measure, and five piles. Most under-sink cabinets need only two or three helpers — a bin, a rod, a mat — once the zones are in place. Buy for the zone that’s failing, in the size your measurements demand.
If your pantry needs the same treatment, the Pantry Reset guide is the companion piece — same zone logic, same measure-first rule, mercifully fewer pipes.
Keep going: Pantry Reset.
Leave a Reply