Author: scottrox

  • Fridge Zones: Stop Losing Food in Your Own Refrigerator

    Fridge Zones: Stop Losing Food in Your Own Refrigerator

    Disclosure: This post contains affiliate links. If you buy through them, we may earn a commission at no extra cost to you. We only recommend storage we’d use in a normal-sized home — and every product suggestion here comes with the dimensions to check before you buy.

    The Short Answer

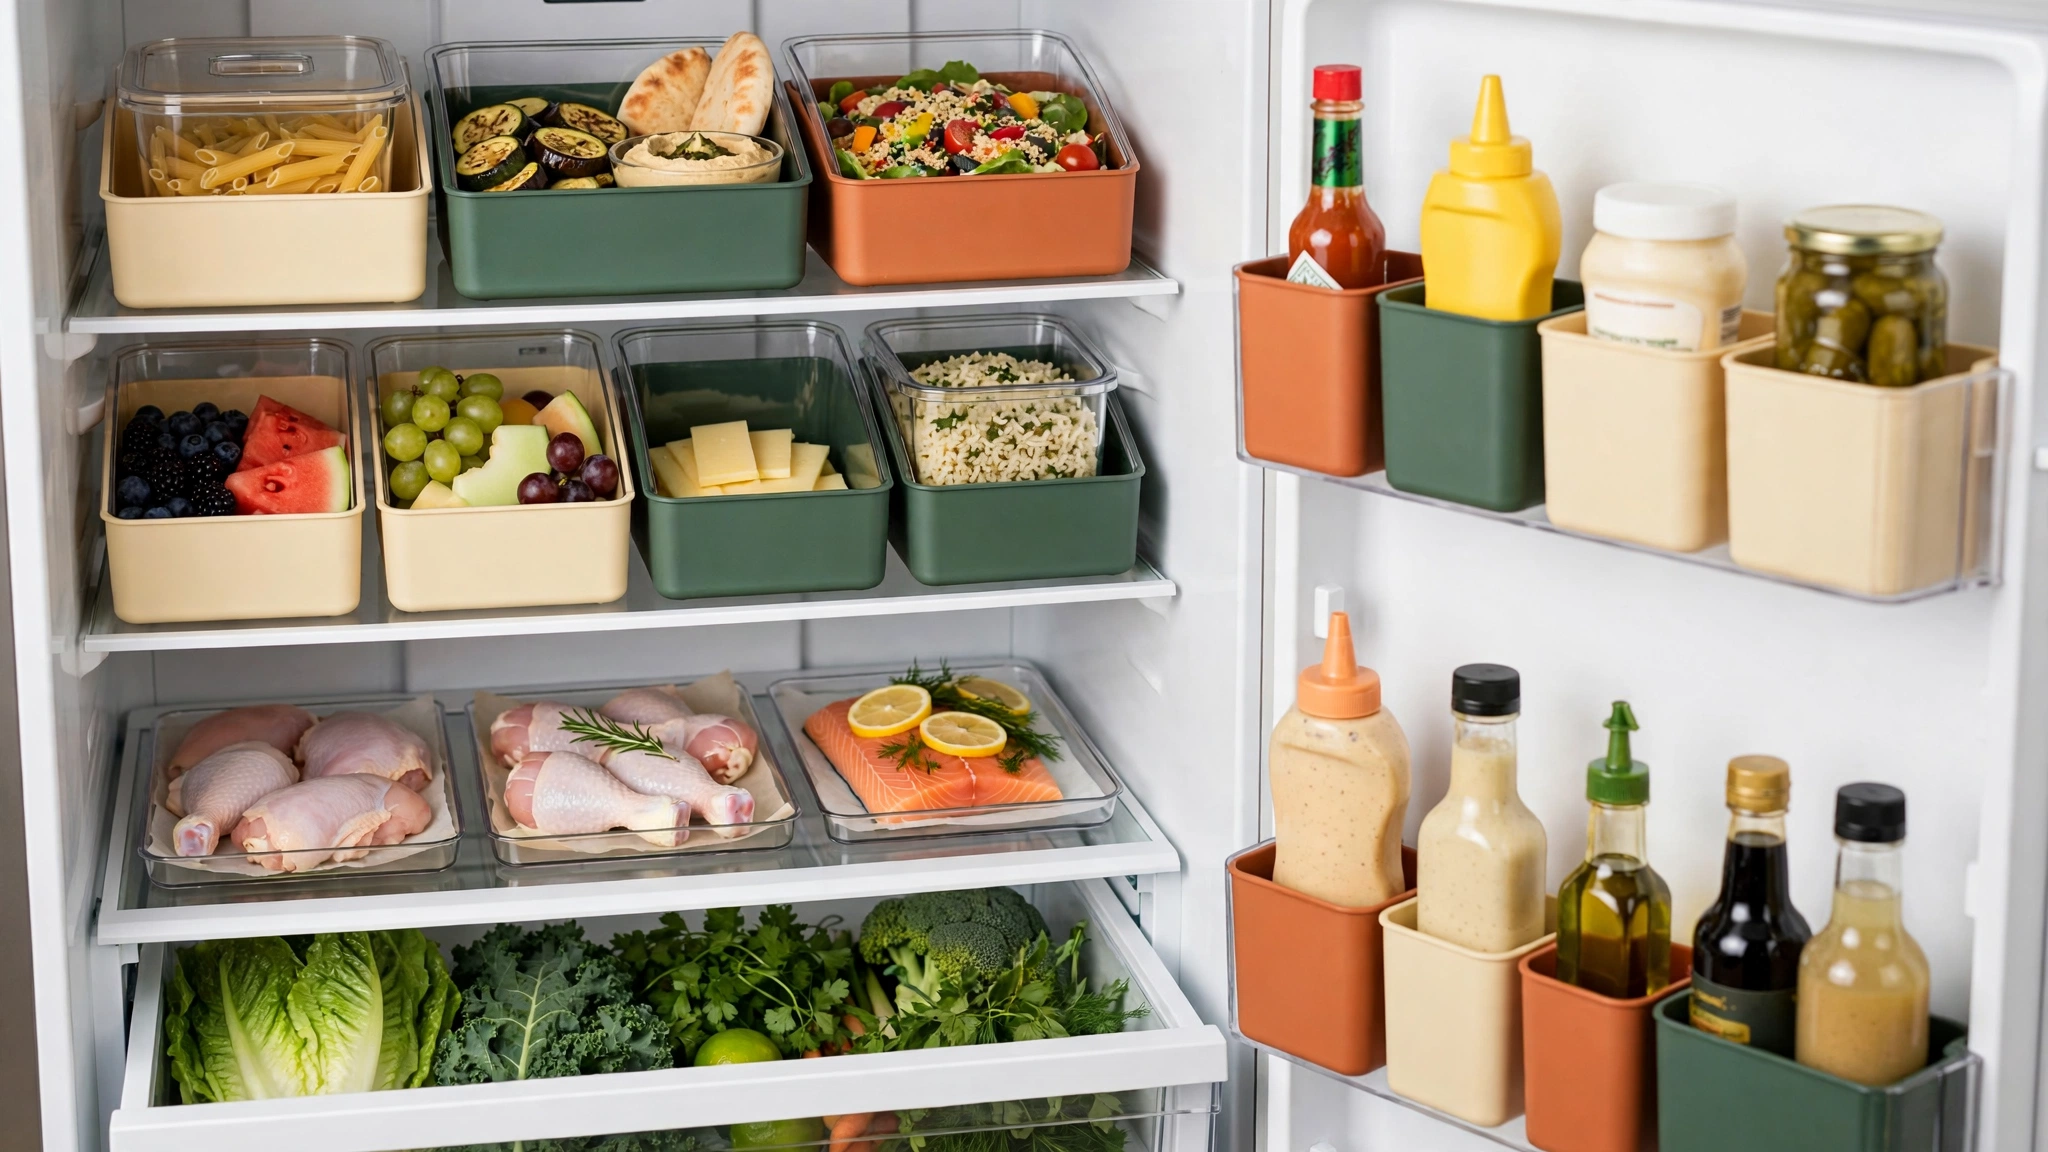
    To stop losing food in your fridge, organize it by temperature, not by food type. Your fridge is not one cold box — it’s a set of temperature zones. The door is the warmest spot, so it belongs to condiments only. Upper shelves hold ready-to-eat food and leftovers. Raw meat goes on the lowest shelf, contained in a bin so it can’t drip. Add one clear “eat me first” bin for anything on its last days, label leftovers with the date, and run a 10-minute sweep once a week. Food doesn’t get lost because you’re careless — it gets lost because it was invisible.

    First: You’re Not Wasting Food Because You’re Lazy

    Every fridge has a graveyard. The bag of salad gone soft behind the milk. The half onion that dried into a science project. The leftovers you fully intended to eat — on the day they quietly passed the point of no return.

    Here’s the thing: almost none of that is a willpower problem. It’s a visibility problem. Food in the back of a deep shelf, in an opaque container, behind three other things, effectively doesn’t exist. You can’t eat what you can’t see, and you definitely can’t eat what you forgot you bought.

    The fix isn’t a bigger fridge or a stricter personality. It’s zones — putting each kind of food where your fridge’s temperatures say it should live, in containers you can see through, with one dedicated bin for the food that needs eating now.

    Know Your Fridge’s Real Temperature Zones

    Your fridge has warm and cold spots whether you use them or not. The only question is whether the right food ends up in each one.

    First, the baseline: your fridge should be set at or below 40°F (4°C), the standard food-safety recommendation. If your fridge doesn’t show the temperature, an inexpensive appliance thermometer takes the guessing out of it.

    fridge thermometer

    Then, the zones, warmest to coldest:

    • The door is the warmest, most temperature-buffeted spot in the whole fridge. Every opening swings it toward room temperature.
    • The upper shelves are moderately cold and the most visible real estate you have.
    • The lower shelves are the coldest part of the main compartment.
    • The crisper drawers can be set more or less humid, which makes them right for produce — more on that below.

    Every zone assignment in this guide follows from those four facts.

    The Zone System

    Zone 1: The Door — Condiments Only

    Ketchup, mustard, hot sauce, pickles, jams, bottled dressings. These are built to handle temperature swings — they’re acidic, salty, or sugary enough to be forgiving, and they’re the foods that can survive the door.

    What does not belong here, even though the fridge has a cute little compartment shaped for it: eggs and milk. The egg door is a marketing feature, not a food-safety feature. Eggs and milk belong on a shelf inside the fridge, where the temperature is colder and steadier.

    What works here: the built-in door shelves are fine as-is. A slim turntable (most run 10–12″ in diameter) on a shelf inside can handle the condiment overflow if your door is packed — measure your shelf depth first, as always.

    Why: every time a perishable gets demoted to the door, it ages faster. Keeping the door condiment-only removes a whole category of quiet spoilage.

    Zone 2: Upper Shelves — Ready-to-Eat and Leftovers

    This is your prime viewing area, so it belongs to food that needs attention: leftovers, ready-to-eat items, yogurt, cheese, drinks, the deli meat for this week’s lunches.

    What works here: clear, stackable containers for leftovers — square ones use the space better than round. Typical sets run 4–7″ wide in stackable sizes; measure your shelf height (usually 8–12″ between shelves) before buying a tall stack. Keep this zone to one or two containers deep. The moment leftovers stack three deep, the back ones are already lost.

    Why: leftovers have the shortest clock in the fridge — generally 3–4 days for cooked food. They earn the most visible shelf precisely because they have the least time.

    Zone 3: The “Eat Me First” Bin — Your Anti-Waste Engine

    This is the single highest-impact change in this entire guide: one clear bin, at eye level, holding only the food that needs to be eaten in the next day or two.

    The half pepper. The opened can of beans. The yogurt expiring Thursday. The leftover rice from Monday. When something enters its final days, it moves into the bin. The household rule is simple: check the bin before you cook, snack, or order takeout.

    What works here: one clear bin with handles, roughly 12–14″ long × 6–8″ wide × 4–6″ tall — big enough for a few items, small enough that it can’t become a second graveyard. Clear is non-negotiable; an opaque bin is just a smaller place to lose food.

    clear fridge bin with handles
    clear stackable fridge bins

    Why: it converts “we should use that up” (vague, forgettable) into a physical place you look (specific, hard to miss). Most households find this one bin does more for food waste than every other tip combined.

    Zone 4: Lower Shelf — Raw Proteins, Contained

    Raw meat, poultry, and seafood go on the lowest shelf, full stop. If a package leaks — and eventually one will — gravity works for you instead of dripping contamination onto everything below it.

    What works here: one washable, low-walled bin or tray that lives permanently on that shelf, roughly 14–16″ long × 9–10″ wide × 2–3″ tall — think a shallow tray that contains drips, not a deep bucket. Packages go in the tray, never loose on the shelf.

    washable fridge tray for raw meat

    Why: containment is the whole point. A drip inside a tray is a 30-second rinse. A drip across a shelf and everything under it is a full fridge clean-out and a pile of thrown-out food.

    Zone 5: Crisper Drawers — Humidity, in Plain Language

    Most crispers have a little slider marked high/low humidity, and almost nobody touches it. Here’s the translation:

    • High humidity (slider closed): traps moisture. Use it for leafy greens, herbs, and anything that wilts — lettuce, spinach, cilantro.
    • Low humidity (slider open): lets gases escape. Use it for fruits and anything that rots or ripens fast — apples, pears, peppers.

    Can’t remember which is which? Remember “greens want a rainforest, fruits want a breeze.”

    Why: produce is the most expensive thing most of us throw away. The drawers are already the right tool — they just need to be assigned instead of treated as random overflow.

    Measure First: Bins That Fit Your Actual Fridge

    The fridge aisle of every store is full of beautiful bin sets sized for somebody else’s refrigerator. Fridges vary more than almost any other storage space in the house — measure yours before you buy a single bin.

    Measure thisHow to do itWhy it matters
    Shelf depthFront edge to back wall, each shelfInterior depth is commonly 14–20″ once door bins are counted — and it’s the #1 reason bin sets don’t fit.
    Shelf heightShelf top to the shelf or drawer above itDecides whether stackable bins and tall bottles both survive.
    Shelf widthSide wall to side wallTwo 8″ bins don’t fit a 15″ shelf next to a gallon of milk. Do the milk math.
    Crisper drawer interiorInside length, width, and heightProduce organizers only help if the drawer still closes.
    Door bin width and depthInside each door shelfSlim bottles and jars fit here; gallon jugs usually don’t.

    Write the numbers in your phone, same as the pantry. If a bin’s product page doesn’t list dimensions, skip it.

    Clear-Bin Strategy: What Goes in Bins — and What Doesn’t

    Bins earn their place in the fridge, but selectively. The rule: bins are for corralling categories, not for storing everything.

    Belongs in bins:

    • The “eat me first” bin (Zone 3) — the non-negotiable one
    • Raw proteins, in their containment tray (Zone 4)
    • Small loose items that roll, tip, or migrate — cheese sticks, yogurt tubes, sauce packets, snack-size items
    • One category per bin, labeled with the zone, not an inventory list

    Does NOT belong in bins:

    • Tall bottles and gallon jugs — a bin around a milk jug just adds a step between you and the milk
    • Anything you grab daily with one hand — if a bin slows down a daily habit, the bin will end up abandoned on a counter
    • Big produce — melons, cabbage heads, and corn take bin space out of all proportion to their benefit; they can live loose in the crisper
    • Leftovers in opaque containers — bin or no bin, if you can’t see it, it’s already on its way out

    The Two Habits That Keep the System Alive

    1. Label with a date. Leftovers get a piece of masking tape with the day they were cooked — “Tue — chicken soup.” Not the day you hope to eat it, not a use-by guess: the cook date. Then the 3–4 day rule does the deciding, and nobody has to perform the sniff test and a small act of faith. Tape and a marker live in the kitchen, near the containers, or this habit dies by Friday.

    2. Newest goes in back. Same rule as the pantry, for the same reason: the older item should always be the one you reach first.

    masking tape and label set for food containers

    The 10-Minute Weekly Fridge Sweep

    Tie this to trash day — it’s the perfect anchor, because anything you find can go straight out to the curb instead of sitting in your kitchen trash all week.

    Set a timer for 10 minutes and do only this:

    • Bin check (3 min): open the “eat me first” bin. Tonight’s dinner plan now includes whatever is in it. Anything past saving goes in the trash bag in your hand.
    • Date scan (3 min): read the tape labels on the leftovers. Anything at day 4 or beyond goes out. No debates, no sniff tests — the date decides.
    • Drip and tray check (2 min): peek at the protein tray and wipe the one spill you can see. Two minutes now beats a full shelf scrub later.
    • Reset the zones (2 min): milk and eggs back inside off the door shelf if they wandered, condiments back to the door, leftovers front and center on the upper shelf.

    That’s it. Ten minutes, once a week, timed to the one day the trash leaves anyway. Your fridge stops being an archive and goes back to being a tool.

    FAQ

    Where is the coldest part of the fridge?
    The lower shelves, toward the back — that’s why raw proteins live on the lowest shelf (in a containment tray, so drips can’t reach anything else). The warmest spot is the door, which is why it belongs to condiments only.

    Should eggs and milk really not go in the door?
    Right — despite the egg-shaped door compartment many fridges come with. Eggs and milk keep best at a cold, steady temperature, which means a shelf inside the fridge, not the door that swings into room air a dozen times a day.

    How long do leftovers actually last?
    As a general rule, cooked leftovers are good for 3–4 days in a fridge kept at or below 40°F. That’s exactly why the date-tape habit matters: “Tuesday” written on the lid is a decision you don’t have to remake on Friday.

    How many fridge bins do I actually need?
    Usually two to start: the “eat me first” bin and the protein containment tray. Add a third for small loose items if they’re genuinely migrating. More bins than that usually means the bins are organizing the bins.

    My fridge is small — does zoning still work?
    Yes, the zones just get smaller and share shelves: condiments stay in the door, leftovers and ready-to-eat share the top shelf, proteins stay lowest and contained. The “eat me first” bin matters more in a small fridge, not less — there’s nowhere for food to hide except behind other food.

    Keep Going: The Kitchen System

    The fridge is one half of the fresh-food problem; the pantry is the other. If you haven’t yet, our Pantry Reset guide sets up the same zone logic for your dry goods — including the same measure-first checklist habit — and its free checklist pairs with the sweep in this guide: pantry reset before the grocery trip, fridge sweep on trash day. Two small habits, one kitchen that stops eating your grocery budget.

    fridge organization starter set

    See it, date it, zone it. That’s the whole system — and the graveyard shift is officially over.

    Keep going: Pantry Reset.
  • The Spice Problem: 4 Systems Ranked by Cabinet Size

    The Spice Problem: 4 Systems Ranked by Cabinet Size

    Disclosure: This post contains affiliate links. If you buy through them, we may earn a commission at no extra cost to you. We only recommend storage we’d use in a normal-sized home — and every product suggestion here comes with the dimensions to check before you buy.

    The Short Answer

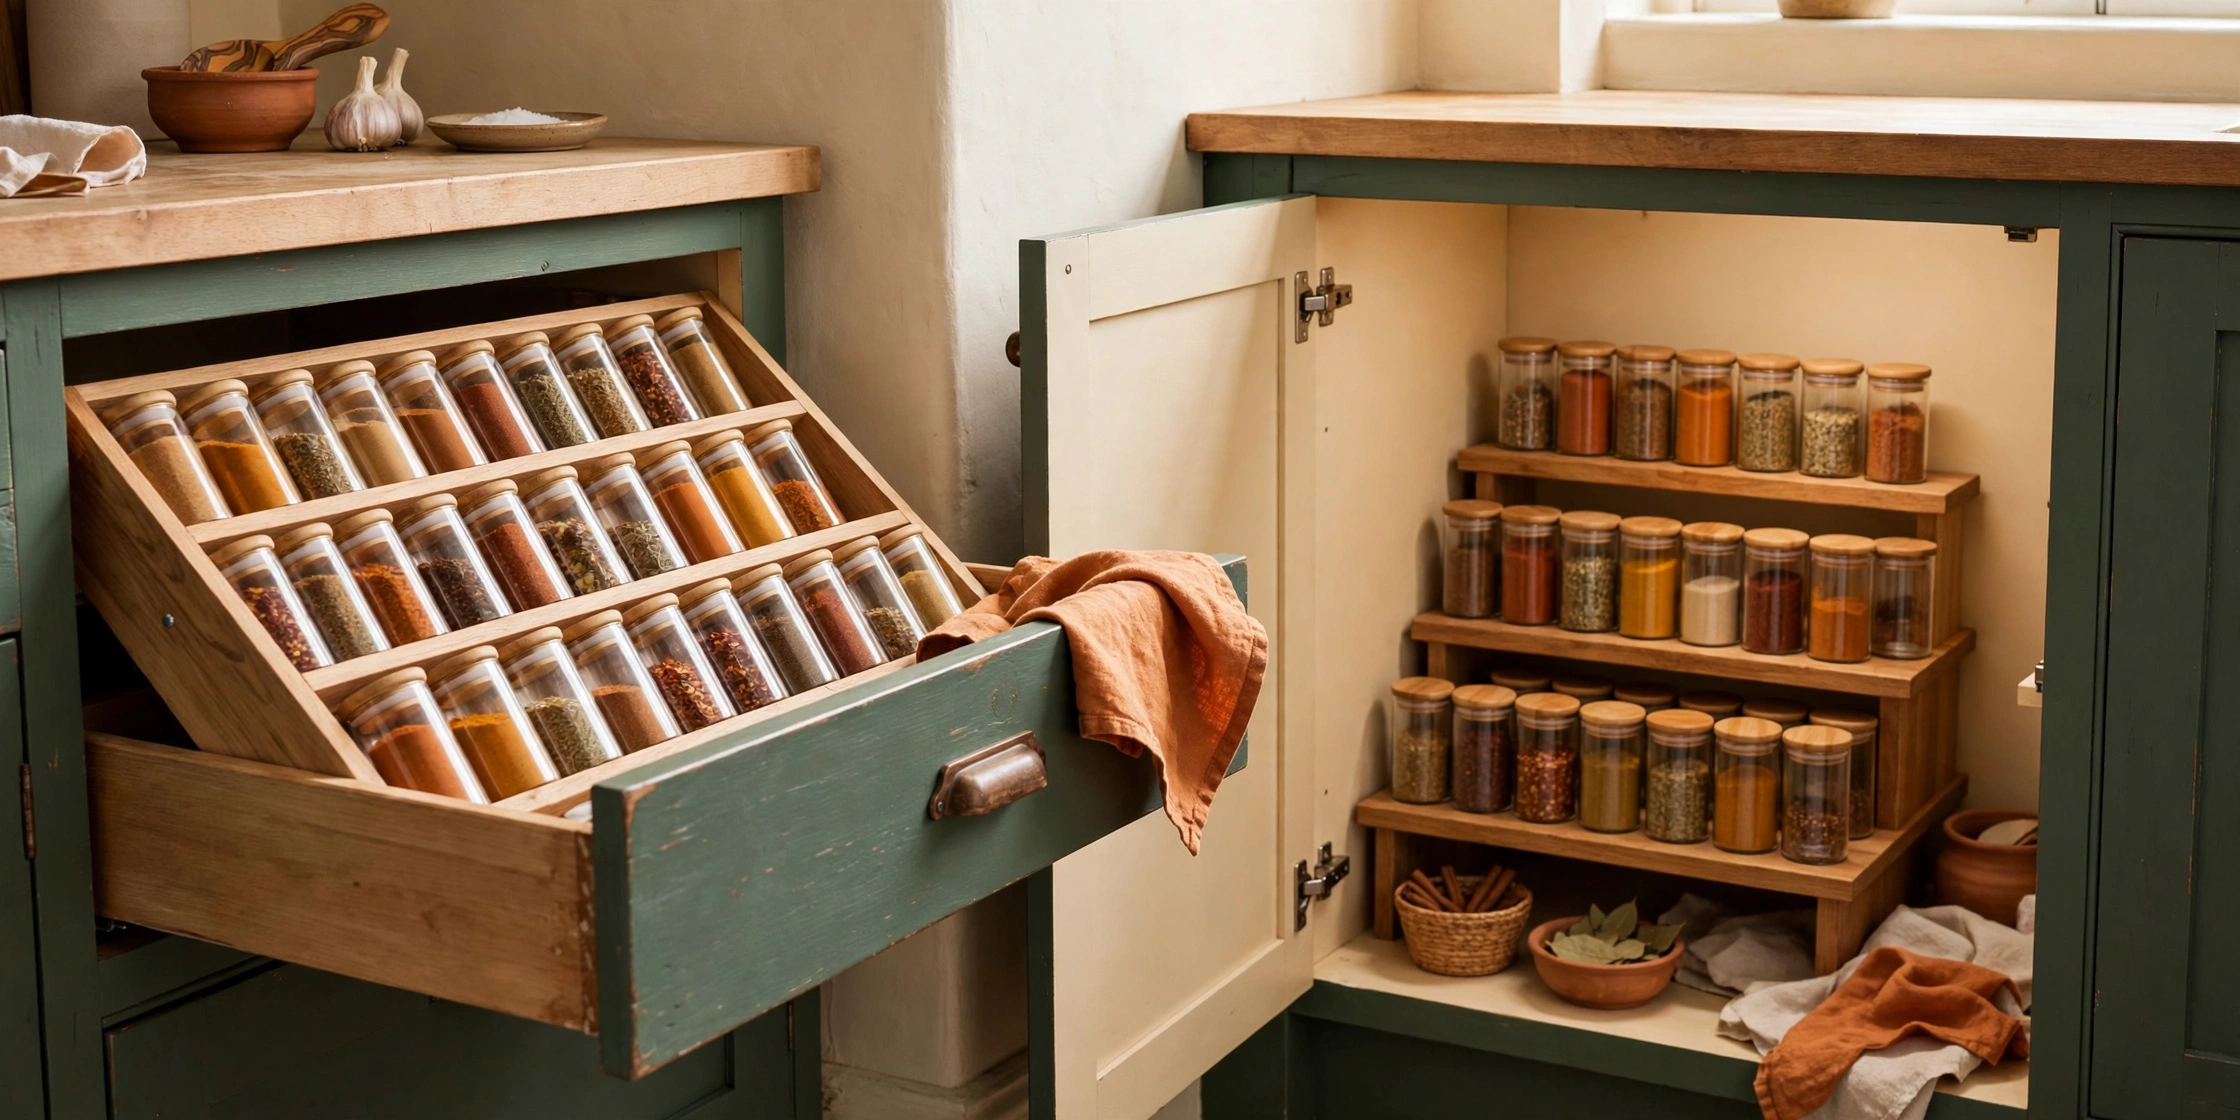
    Spice chaos is almost never a space problem — it’s a visibility problem. If you can only see the front row, the other rows might as well not exist, and that’s how you end up with three jars of cumin. The fix is choosing the system that matches your measurements: a tiered riser for standard cabinets at least 10″ deep, an angled drawer insert if you have a drawer 3″ or deeper to spare, a door or wall rack when shelf space is gone, and a turntable for deep or corner cabinets. Measure first, count your jars second, buy third.

    Nobody Has a Spice Problem. They Have a Visibility Problem.

    Here’s the test: name every spice you own. Not most of them — all of them.

    Most of us can’t. We know the front row by heart (garlic powder, paprika, whatever lives closest to the stove), and the back rows are a rumor. So we buy a new jar of chili powder while a perfectly good one sits two rows back, quietly expiring.

    Spices are small, numerous, and all roughly the same shape — which means any system that hides some of them behind others has failed at its only job. The four systems below all solve visibility differently: lifting the back rows up, laying everything flat, spreading it across a door, or spinning it into view. Which one is right depends entirely on the size of the space you actually have.

    Step 1: Measure Your Space (Before You Look at a Single Rack)

    Five minutes, one tape measure. Jot the numbers in your phone:

    Measure thisHow to do itWhy it matters
    Cabinet widthInside wall to inside wallSystems come in fixed widths (usually 10–24″). A 16″ rack in a 15″ cabinet is a return, not a solution.
    Cabinet depthFront edge to back wallMost upper cabinets are about 11–12″ deep inside. Depth decides whether tiers or a turntable will fit.
    Shelf spacingShelf surface to the underside of the shelf aboveMost spice systems need 5–7″ of vertical room once jars stand on them.
    Drawer width, depth, and heightInside dimensions, all threeDrawer inserts need a drawer roughly 3″ deep or more, and inserts come in fixed sizes that must match your drawer.
    Door inside width and thicknessFlat area of the cabinet doorDoor-mounted racks typically need 10–16″ of flat width and add about 2–3″ of depth when the door closes.

    Then count. Pull every spice out and make an honest pile. Most households land between 20 and 40 jars — if your pile is 55, no single system below will hold it all, and that’s useful to know before you shop.

    The jar math: a typical 4 oz spice jar — the standard grocery-store size — is about 4″ tall and roughly 2″ in diameter (typical range: about 3.75–4.5″ tall, 1.75–2.25″ across). Bulk jars run bigger, roughly 5.5–7″ tall. Every capacity below assumes standard 4 oz jars; if your collection is mostly bulk jars, cut the capacity by a third.

    The 4 Systems, Ranked by the Space They Need

    System 1: The Tiered Shelf Riser — Best for Most Standard Cabinets

    Needs: a cabinet at least 10″ deep and 12″ wide, with about 6″ of shelf height above it for jars on the top tier.

    Realistic capacity: about 18–24 standard jars on a typical 3-tier riser, 12–16″ wide.

    Picture stadium seating for spices: two or three steps, back row highest. It’s the classic for a reason — cheap, no installation, works in cabinets, pantries, and on counters.

    Visibility strength: good for the top rows — you read the back row’s labels over the heads of the front row.

    Failure mode: the front-bottom row. Jars on the lowest step hide behind the cabinet’s face frame on some cabinets, and on deep cabinets (12″+) the riser only fixes the front half — spices still lurk behind it.

    tiered spice shelf riser, expandable
    3-tier cabinet shelf organizer

    Buy it if: you have a normal cabinet, a normal budget, and 25 or fewer everyday spices.

    System 2: The In-Drawer Angled Insert — Best Visibility, If You Have the Drawer

    Needs: a drawer at least 3″ deep inside (4″ is more comfortable), and an insert sized to your drawer’s inside dimensions — common inserts fit drawers roughly 13–20″ wide and 15–21″ deep, often trimmable or expandable.

    Realistic capacity: about 24–36 standard jars in a mid-size drawer, laid in angled rows.

    The insert holds jars tilted toward you, labels up, like a spice filing cabinet. Every jar is visible at a glance — genuinely the best visibility of the four systems.

    Visibility strength: excellent — the only system where 100% of your collection is visible at once.

    Failure mode: it costs you a whole drawer. In a small kitchen, drawers are prime real estate, and giving one up entirely to spices is a real trade. Odd-shaped and bulk jars don’t fit the angled slots and end up exiled to a cabinet anyway, splitting your collection in two.

    in-drawer spice rack insert, expandable
    bamboo drawer spice organizer insert

    Buy it if: you have a spare drawer near the stove and cook with spices daily. This is the cook’s system.

    System 3: The Door or Wall-Mounted Rack — Best When Shelf Space Is Gone

    Needs: a flat surface. Inside a cabinet door: about 10–16″ of flat width and enough clearance that the rack (roughly 2–3″ deep loaded) doesn’t collide with the shelves when the door closes. Or a stretch of free wall near the stove.

    Realistic capacity: about 16–24 standard jars across 3–4 door-mounted rows.

    This system creates storage out of nothing — dead door space becomes a spice rack, and your shelves stay free.

    Visibility strength: very good. One jar deep, everything facing you, nothing behind anything.

    Failure mode: the door itself. Slam it and jars rattle — or worse, a loose jar jumps. Heavy collections can strain hinges over time, adhesive-only versions eventually let go in steamy kitchens (screw-mounted is sturdier), and wall-mounted jars near the stove sit exposed to heat and light, which spices don’t love.

    cabinet door spice rack, screw mount
    wall mounted spice rack set

    Buy it if: your cabinets are full but you’ve got a door or a free wall — classic small-kitchen move.

    System 4: The Turntable — Best for Deep and Corner Cabinets

    Needs: room for the disc plus spin clearance — a 10–12″ turntable for standard cabinets, up to 18″ for a deep pantry shelf or corner cabinet. Leave about 1″ of clearance all around so it actually rotates.

    Realistic capacity: about 10–14 standard jars on a 12″ turntable in a single ring, fewer if you double-ring larger jars in the middle.

    The lazy Susan approach: everything on a disc, spin to browse. It’s the only system here that tames a deep cabinet or awkward corner, where a riser’s tiers would be unreachable.

    Visibility strength: mixed. One spin shows you everything — eventually. At any given moment, half your spices face away.

    Failure mode: the spin giveth and the spin taketh. Jars near the edge topple when you rotate too fast, tall bottles wobble, and a turntable in a shallow cabinet wastes the corners of its shelf (round peg, square hole). Two-tier versions exist, but the lower tier hides under the upper disc — recreating the exact problem we started with.

    lazy susan turntable, 12 inch
    two-tier turntable organizer

    Buy it if: your spice spot is deep, cornered, or otherwise unreachable. It’s a reach fix first and a visibility fix second.

    Quick Picks by Cabinet Situation

    Your situationYour system
    Standard cabinet, 20–25 jarsTiered riser
    Spare drawer near the stoveIn-drawer insert
    Cabinets full, door or wall freeDoor/wall rack
    Deep or corner cabinetTurntable
    More than 40 jarsTwo systems — daily drivers in a riser or drawer, backstock jars in the pantry

    The Honest Decant-or-Not Take

    Should you pour everything into matching jars? Our honest answer: probably not all of it.

    Decanting makes sense for exactly two groups: the bulk or club-store spices in containers too big for any system above, and the five or six daily drivers you refill constantly. Uniform jars genuinely help there — same footprint, stackable, easy to label.

    Everything else? Original jars are fine. They already have labels and already fit. A full decanting project also has a hidden cost: a second, secret spice collection — the half-empty original bags and tubs living somewhere else, waiting to refill the pretty jars. That’s not organization, that’s a supply chain.

    Label So Future You Can See It

    Visibility doesn’t stop at the rack:

    1. Label the top, not just the front. On risers and turntables you read jars from above half the time. A dot of masking tape with the name on the lid makes every system faster.
    2. Add the year. Spices don’t spoil dangerously, they just fade — most ground spices are past their best after 2–3 years. A small “2026” on the lid tells you when to stop wondering why the chili tastes like dust.
    3. Keep like with like. Baking spices together, everyday savory together, the hot stuff together. Groups survive; strict alphabetical order collapses the first time someone else cooks.

    The Reality Check: How Many Spices Do You Actually Own?

    Before any of this, do the count from Step 1 — and be honest about what the pile says. The pattern is remarkably consistent: roughly 10 spices do 90% of the cooking, another 10–15 rotate in monthly, and the rest — specialty blends, one-recipe wonders, souvenir tins — get touched a few times a year.

    So don’t buy a system for all 50. Buy for the 20–25 you actually use, in your best-visibility spot, and give the long tail a simple bin in the pantry as backstock. A smaller collection in a system that fits beats a giant one crammed into a system that doesn’t.

    FAQ

    What’s the best spice organizer for a small cabinet?
    A tiered riser, if the cabinet is at least 10″ deep and 12″ wide — it fits most standard cabinets with no installation. Too shallow or narrow? A door-mounted rack moves the whole problem off the shelf.

    How many spice jars fit in a standard kitchen drawer?
    With an angled insert in a mid-size drawer (about 15–18″ wide inside), roughly 24–36 standard 4 oz jars. The drawer needs to be at least 3″ deep — and measure before ordering, because inserts are sized to specific dimensions and “close” doesn’t fit.

    Is a lazy Susan good for spices?
    For one specific job: deep or corner cabinets where you can’t reach the back. It’s the weakest of the four for pure visibility — half the jars face away at any moment — and jars can topple if you spin it hard. Use it to fix reach, not as a default.

    Should I transfer all my spices into matching jars?
    No. Decant bulk buys and daily drivers if you like; leave the rest in their original jars with a name and year on the lid. A full matching set looks tidy for one grocery cycle, then you’re maintaining refill stock somewhere else.

    How long do spices stay good?
    Ground spices are usually at their best for about 2–3 years, whole spices closer to 3–4. They don’t become unsafe, just dull. If you can’t remember buying it and it smells like nothing, it will taste like nothing — let it go.

    Start With the System That Fits Your Cabinet

    That’s the whole method: visibility is the problem, your measurements pick the system, and your actual jar count — not your aspirational one — picks the size. Any of the four beats the front-row-only cabinet you’re cooking from now.

    Working through the rest of the kitchen? Our Pantry Reset guide applies the same measure-first thinking to the whole pantry.

    Keep going: Pantry Reset and No Pantry Storage.

  • Under-Sink Chaos, Fixed: The 5 Zones Every Kitchen Sink Cabinet Needs

    Under-Sink Chaos, Fixed: The 5 Zones Every Kitchen Sink Cabinet Needs

    Disclosure: This post contains affiliate links. If you buy through them, we may earn a commission at no extra cost to you. We only recommend storage we’d use in a normal-sized home — and every product suggestion here comes with the dimensions to check before you buy.

    The Short Answer

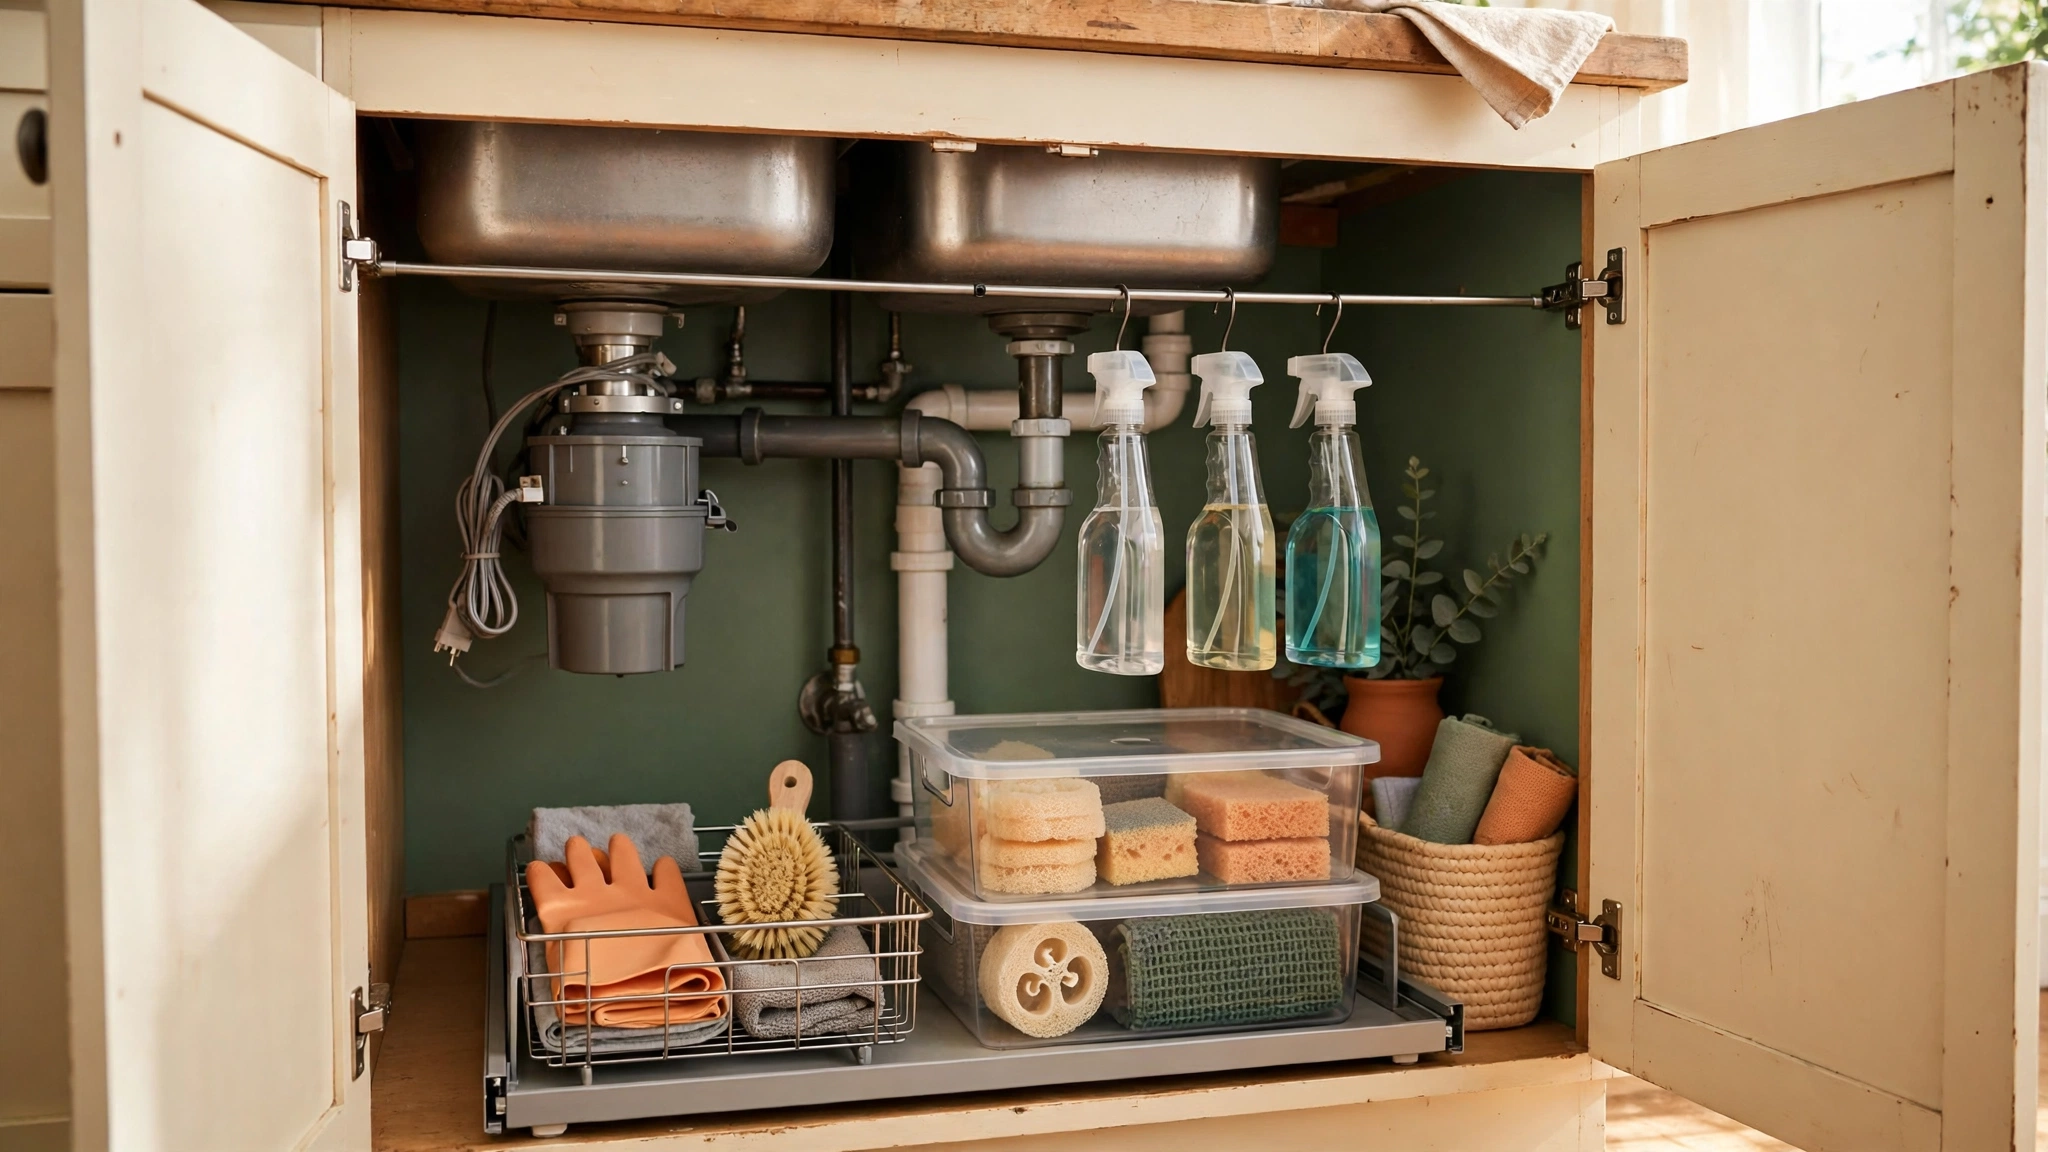
    To organize under your kitchen sink, stop treating it like a normal cabinet — the pipes and garbage disposal eat the middle. Measure the clear space on each side of the plumbing first, then split what’s left into five zones: daily sprays, wash and scrub tools, trash and recycling bags, refills and backstock, and safety-locked items. Use narrow bins and a sliding caddy sized to the gaps beside the pipes, hang spray bottles from a tension rod, and keep the center low and clear so you can spot leaks and reach the shut-off valves.

    The Hardest Cabinet in the House

    Every kitchen has one cabinet that defeats people, and it’s almost always this one.

    It’s not your fault. A normal cabinet is an empty box. This one has a sink basin dropping into the top, a garbage disposal hanging in the middle, supply lines, a drain trap shaped like a hook, and often a filter or dishwasher line joining the party. The usable space is two odd side pockets and a shallow strip in front of the pipes — that’s it.

    The fix isn’t more bins. It’s measuring the space the plumbing leaves you, and giving the five things that live down there five actual homes.

    Step 1: Empty It, Wipe It, Look at the Plumbing

    Pull everything out — including the bottle from 2019 with the label worn off. While it’s empty, do three things most people skip:

    1. Wipe the cabinet floor and look at it. Water stains, warping, or a soft spot mean a slow leak — past or present. Learn that today, not after loading organizers on top of it.
    2. Run the water, then the disposal, and feel the trap and supply-line joints with a dry hand or paper towel. Any dampness? Fix the leak before you organize — organizing around a drip gives you organized mold.
    3. Find your shut-off valves. Nothing in the finished system should block them — in a leak emergency, you don’t want to be unloading bins to reach them.

    Now sort the pile into the five zones from Step 3, plus a “doesn’t belong here” pile — usually bigger than people expect.

    Step 2: Measure Around the Plumbing (This Is the Whole Game)

    Standard sink base cabinets are 24″ deep and about 36″ wide (30″ and 33″ are common too), with roughly 28–30″ of height inside — but the basin and disposal claim most of the upper middle. What you actually own is the space around them. Measure yours:

    The Under-Sink Measure-First Checklist

    Measure thisHow to do itWhy it matters
    Cabinet width and depthInside, wall to wall; front frame to back wallMost organizers assume a 24″-deep cabinet — verify yours.
    Usable height on each sideFloor to the underside of the sink basin, left and right of the disposalThe two sides often differ. Stackable bins must clear the lower side.
    Disposal footprintWidth of the disposal body, and how far it hangs downSets the gap beside it. Sliding caddies need an 11–13″ clear lane.
    Trap positionHow far the P-trap juts toward the doors, and its lowest pointAnything tall in the front-center hits it. This is your “keep low” zone.
    Door opening widthThe frame opening, not the door itselfPull-outs must be narrower than the opening, not the cabinet. The #1 fit failure.
    Door inside depthDoor thickness and hinge clearance, if you’ll mount anything on the doorDoor holders add 3–5″ of depth and must clear the trap when the door closes.

    Typical result: two side pockets roughly 10–14″ wide and 14–18″ tall, plus a front strip about 8–10″ tall under the trap. Write the numbers in your phone; every product below lists what to check against them.

    Step 3: Set Up the 5 Zones

    Zone 1: Daily Sprays (front, dominant-hand side)

    Dish soap, counter spray, glass cleaner — the bottles you grab daily, often with wet hands. They belong at the front on whichever side you naturally reach with your main hand.

    What works here: a narrow open bin or caddy, about 10–12″ wide, that keeps bottles upright. Even better: hang the spray bottles from a tension rod across the top of the cabinet (Step 4) and free the floor entirely.

    narrow under sink caddy bin
    cabinet tension rod, adjustable

    Why: loose sprays are this cabinet’s dominoes — one falls, takes three with it, and leaks on everything. Upright and grouped, they stop wandering.

    Zone 2: Wash and Scrub Tools (on the door or the front edge)

    Sponges, brushes, scrub pads, rubber gloves. Small items, used constantly, always damp.

    What works here: a door-mounted holder or over-cabinet-door basket at the front — typically 8–12″ wide and 3–4″ deep. Confirm it clears the trap when the door closes. Gloves can drape over the tension rod, where they actually dry.

    over cabinet door organizer basket
    sponge and brush holder for cabinet door

    Why: damp tools in the dark back corner are where the under-sink smell comes from. Front and ventilated beats deep and forgotten.

    Zone 3: Trash and Recycling Bags (one side, flat and boring)

    Trash bags, recycling bags, compost liners. Flat, light, used one at a time — they don’t deserve prime front space, but they do deserve a place.

    What works here: lay the rolls flat along one side wall, stand them in a slim bin about 5–6″ wide, or use a wall/door-mounted bag dispenser so rolls stop unspooling into the cabinet.

    grocery bag holder dispenser

    Why: bags are the classic “tossed anywhere” item that slowly fills every gap. Flat against a wall, they take almost no room and stop migrating.

    Zone 4: Refills and Backstock (the back, in one bin)

    The second bottle of dish soap, bulk dishwasher tabs, the refill jug, spare sponges. Duplicates only — nothing used daily lives back here.

    What works here: one stackable bin at the back of the taller side. Standard stackable under-sink bins run about 14″ long × 8″ wide × 6–7″ tall per tier — measure your side-pocket height and do the math for two. Clear or open-front styles beat solid ones: backstock you can’t see gets rebought.

    stackable under sink bins, 2 tier

    Why: backstock in a bin is inventory. Backstock scattered behind the pipes is a future discovery of three half-used bottles of the same cleaner.

    Zone 5: Safety-Locked Items (up high or latched, always)

    Drain cleaner, oven cleaner, anything with skull-and-crossbones energy — especially if kids or grandkids are ever in your kitchen. These don’t get a casual bin.

    What works here: a bin with a locking lid, on the highest spot your cabinet offers. With young children in the house, be honest: the real answer may be a latched or high cabinet instead. This is the one zone where “move it out” is a legitimate system.

    locking storage bin for chemicals

    Why: under-sink is the classic under-five reach zone, and it’s where the strongest chemicals traditionally live. Zones 1–4 make life easier; this one prevents a bad day.

    Step 4: Storage That Works Around Pipes (and What Doesn’t)

    Four solutions earn their keep down here:

    • Sliding caddies / pull-out frames. A caddy roughly 12″ wide × 18″ deep that slides toward you beats reaching past the trap. It must be narrower than your door opening, with a clear lane beside the disposal. Gap under 11″? Use a handled bin instead.
    • Stackable bins on one side only. Stack where there’s more height. Stacking in the middle collides with the disposal every time.
    • A tension rod across the top. Spray bottles hang by their triggers, gloves drape to dry, the floor stays clear. Most cabinets fit a 17–28″ adjustable rod — buy the range that brackets your inside width.
    • Door-mounted holders. Great for Zone 2 tools and bag rolls, but they add depth — dry-fit before you commit. If the door won’t close cleanly, the holder loses.

    One popular solution to be careful with: the lazy Susan. Wonderful in pantries; under a sink, the round footprint wastes corners, bottles tip toward the pipes, and nothing stacks. In a wide (36″+) cabinet with a shallow trap, a small one can work on a side. In most cabinets, a rectangular caddy wins.

    Step 5: The Moisture and Leak Watch

    This is the only cabinet with water running through it, so the system includes a two-minute habit:

    • Line the floor. A waterproof under-sink mat (common sizes: 30″ × 24″ and 36″ × 24″) catches drips before they soak the floor. A low lip buys you time when a bottle leaks.
    • Feel the pipes monthly. Grabbing a refill? Run a dry hand along the trap joints. Damp means a slow leak starting — cheap now, expensive later.
    • Ventilate after a spill. Doors open for an hour after any leak. Trapped damp is the whole under-sink smell problem in one sentence.

    waterproof under sink mat

    What Does NOT Belong Under the Sink

    Part of fixing this cabinet is eviction. These move out today:

    • Anything paper or cardboard — paper towels, food boxes, manuals. Water finds them first; they hide leaks and feed mold.
    • Food, full stop. Not the potatoes, not the onions — it’s dark, damp, and shared with chemicals.
    • Small appliances — cords and motors don’t belong next to a drain trap.
    • Tools and hardware overflow — give the screwdriver-and-tape pile a real home elsewhere.
    • “Someday” chemicals. The specialty cleaner for a surface you no longer own. Unused for a year? Dispose of it per local hazardous-waste rules.

    Every eviction is square inches back for the five zones — and in this cabinet, square inches are the whole budget.

    Common Mistakes That Keep This Cabinet Broken

    Buying a standard cabinet organizer. Most are designed for an empty box: full width, full height, no pipes. Under a sink they collide with the trap or disposal and end up donated. Measure the gaps first (Step 2), buy for the gaps.

    Blocking the shut-off valves. A bin parked in front of the water shut-offs adds minutes to the moment you can least afford them. Keep the center low and the path clear.

    Storing sprays loose. Bottles on their own tip, leak, and roll behind the trap. Every spray gets a bin, a caddy, or the tension rod.

    FAQ

    How do I organize under the sink with a garbage disposal?
    Don’t fight the middle — use the two side pockets. Stackable bins on the taller side, a caddy on the other, and keep the strip in front of the disposal low and clear. Measure the lane beside the disposal first (most pull-out caddies need roughly 11–13″).

    What size organizer fits under a kitchen sink?
    There’s no standard, because the plumbing decides. Cabinets are usually 24″ deep and 30–36″ wide, but usable side pockets are often only 10–14″ wide and 14–18″ tall. Narrow bins around 14″ × 8″ and caddies around 12″ × 18″ fit most setups — after measuring yours.

    How do I keep the under-sink cabinet from smelling?
    Dry is the whole secret. Damp tools at the front or on the door, a waterproof mat on the floor, trap joints checked monthly, and no paper or cardboard. A persistent smell with no visible leak usually means moisture trapped in the cabinet floor — dry it out with the doors open.

    Where should I store cleaning chemicals if I have small kids?
    Not loose under the sink — it’s the easiest cabinet for a toddler to open. Harsh products go in a locking-lid bin at minimum; a high or latched cabinet is better. Under-sink keeps the mild daily sprays.

    Start With Five Zones, Not Five Purchases

    This system doesn’t start with shopping. It starts with an empty cabinet, a tape measure, and five piles. Most under-sink cabinets need only two or three helpers — a bin, a rod, a mat — once the zones are in place. Buy for the zone that’s failing, in the size your measurements demand.

    If your pantry needs the same treatment, the Pantry Reset guide is the companion piece — same zone logic, same measure-first rule, mercifully fewer pipes.

    Keep going: Pantry Reset.

  • No Pantry? 9 Storage Systems That Create One in a Small Kitchen

    No Pantry? 9 Storage Systems That Create One in a Small Kitchen

    Disclosure: This post contains affiliate links. If you buy through them, we may earn a commission at no extra cost to you. We only recommend storage we’d use in a normal-sized home — and every product suggestion here comes with the dimensions to check before you buy.

    The Short Answer

    If your kitchen has no pantry, you don’t need a renovation — you need to claim one small, defined space and give it the pantry job. The most reliable options are a slim rolling cart in a wasted gap, an over-door rack, a freestanding shelf unit on an empty wall, or converting one cabinet with risers and a turntable. Measure the space first, pick the one system that fits it, and stock it by zones — daily items in front, backstock behind — just like a real pantry. One system, fully used, beats five gadgets scattered around the kitchen.

    First: No Pantry Is a Space Problem, Not a You Problem

    Plenty of normal kitchens — especially rentals, older homes, and apartments — were built with exactly zero pantry. So food ends up everywhere: cans over the stove, cereal on top of the fridge, a “snack situation” in three different cabinets.

    That scattered storage is why things get bought twice and lost constantly. The fix isn’t more cabinets. It’s giving your food one home — a single, defined system that works like a pantry, even if it doesn’t look like one. Every system below lists the space it needs, what to measure, and how much it realistically holds.

    Measure First: The 4 Numbers That Decide Everything

    Before you fall for any system below, grab a tape measure and check these. Five minutes here prevents the classic outcome: a cart that doesn’t fit the gap and a rack the door can’t close with.

    Measure thisHow to do itWhy it matters
    Gap widthsMeasure any gaps beside the fridge, stove, or cabinets at floor, middle, and topWalls and appliances are rarely perfectly straight. The narrowest point is your real width.
    Floor footprintWidth × depth of any open floor or wall space you could give upFreestanding units typically need 24–36″ of width and 12–18″ of depth.
    Door clearanceOpen kitchen and cabinet doors fully; note swing pathsOver-door racks add 4–6″ of depth, and slide-out towers need a clear pull path.
    Cabinet interiorHeight, depth, and width inside your biggest cabinetRisers and turntables turn a cabinet into a pantry only if they fit with room to reach in.

    Write the numbers in your phone. Now let’s shop your kitchen for a pantry.

    The 9 Systems That Create a Pantry

    1. The Slim Rolling Cart

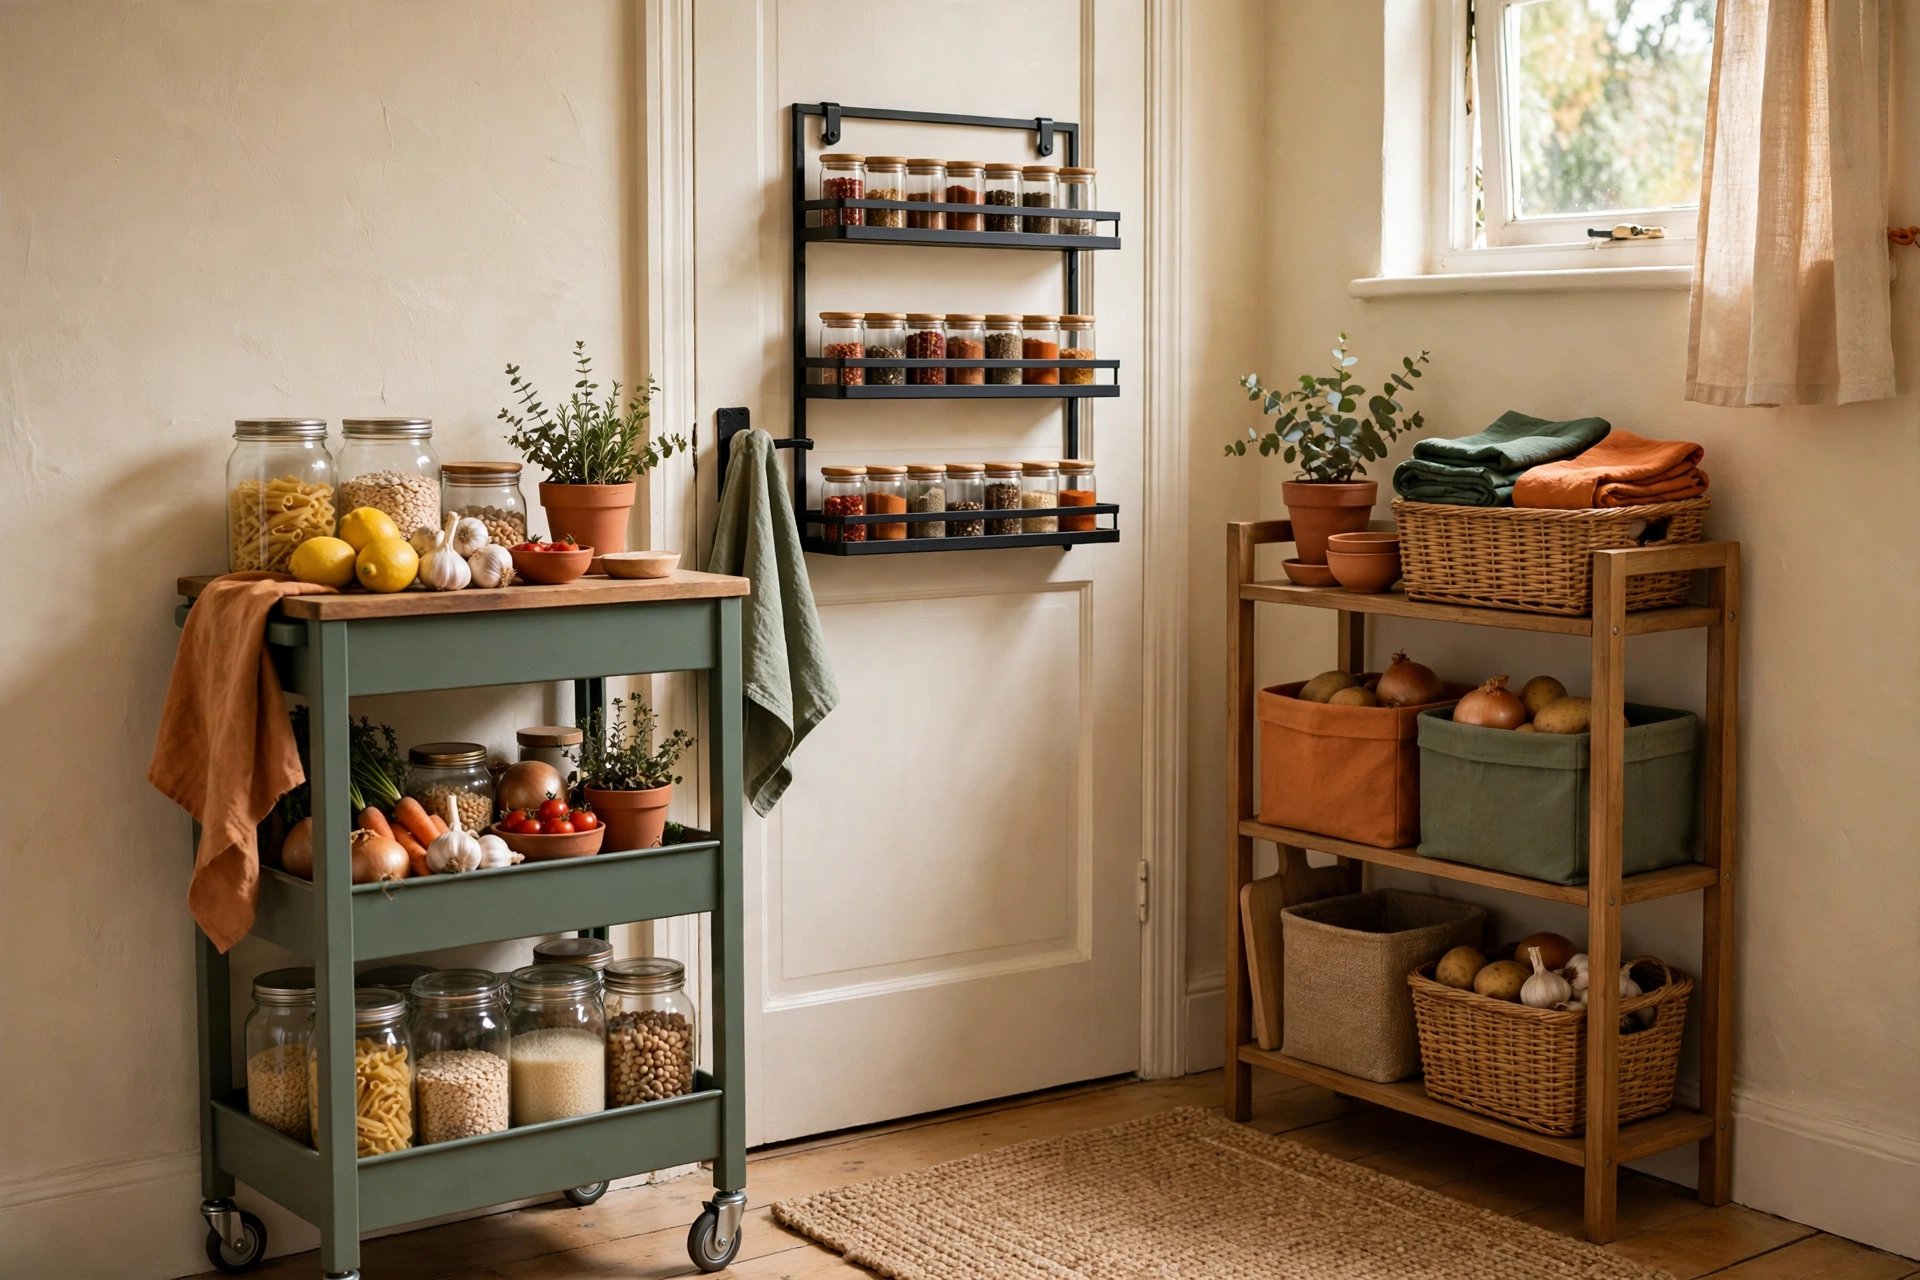
    Space it needs: A floor gap or open strip about 6–14″ wide and 18–24″ deep. Standard 3-tier utility carts run roughly 17″ W × 13″ D × 30″ H; truly slim carts exist at 5–7″ wide for the famous fridge gap.
    Capacity: One tier holds roughly a row of cans or spice jars; a 3-tier cart realistically handles spices, oils, and canned goods for a household of 1–3 — call it one pantry shelf’s worth.
    Best for: The dead gap beside the fridge or stove that’s currently storing dust and a broom.
    Renter-friendly: Completely. No tools, no marks, rolls out when you move.

    slim rolling storage cart
    3-tier rolling utility cart

    2. The Over-Door Rack

    Space it needs: Any flat door — kitchen, closet, or laundry room. Racks typically run 12–24″ wide, hang over doors up to about 1¾” thick, and add 4–6″ of depth on the door’s inside face.
    Capacity: 4–6 shallow shelves hold spices, packets, wraps, and small jars — the light, grabby stuff. Not the place for flour sacks.
    Measure first: Close the door with the rack (or a stand-in of similar depth) in place. Plenty of kitchens have doors that almost clear the frame or a nearby shelf.
    Best for: Renters with a solid door near the kitchen and lots of small items with no home.
    Renter-friendly: Yes — it hangs, no screws. Add felt pads so it doesn’t scuff the door.

    over door pantry organizer rack

    3. The Slim Slide-Out Tower

    Space it needs: A narrow vertical gap 5–10″ wide and 20–24″ deep — beside the fridge is the classic spot. Towers stand 30–48″ tall with 3–5 pull-out tiers.
    Capacity: Built for cans, jars, and bottles in single file — excellent for canned goods and condiments, poor for boxes and bags.
    Best for: Households that keep a lot of cans and jars and have exactly one weird gap.
    Renter-friendly: Yes, freestanding and tool-free. One caution: on uneven floors, a tall narrow tower can wobble when loaded — check stability before you fill it.

    slim slide-out storage tower

    4. The Freestanding Shelf Unit

    Space it needs: The biggest ask here: 24–36″ wide × 12–14″ deep of wall or corner, in the kitchen, dining area, or an adjacent hall. Units run 30–60″ tall with 3–5 shelves.
    Capacity: The highest on this list — a 36″ unit with 4 shelves holds roughly what a small reach-in pantry does. This is the only system here that can be your whole pantry.
    Best for: Anyone with an empty wall and a serious storage shortage. Stock the shelves by zone: daily drivers at waist height, backstock up top.
    Renter-friendly: Yes, with one note: tall units should be anti-tip strapped if kids climb or floors slope — straps usually need one small wall anchor, so ask your landlord or use a wider, shorter unit instead.

    freestanding kitchen shelf unit
    adjustable wire shelving unit

    5. The “Pantry Cabinet” — Risers and Turntables in One Cabinet

    Space it needs: Zero new space. Dedicate your single biggest cabinet — ideally 24–30″ wide — and rebuild the inside. Shelf risers are typically 10–13″ wide with 2–3 tiers; turntables run 10–18″ in diameter.
    Capacity: One cabinet done well holds daily drivers and cooking staples for most households. Risers fix the “cans hiding behind cans” problem; a turntable fixes the deep-corner dead zone.
    Best for: People who truly have no floor or wall space to give. This is the smallest-footprint real system on the list.
    Renter-friendly: Completely — everything lifts out at move-out.

    tiered cabinet shelf riser
    lazy susan turntable for cabinets

    6. The Wall Rail System

    Space it needs: A stretch of bare wall 16–32″ wide with stud access (or solid anchors). Rails mount horizontally; hooks, baskets, and small shelves hang from them, projecting only 4–8″ into the room.
    Capacity: Modest but mighty for its footprint — utensils, spices, oils, and hanging baskets for produce or packets.
    Best for: Kitchens with wall space but no floor space, especially above a counter or beside the stove.
    Renter-friendly: The weakest on this list — rails need screws. If your lease forbids holes, skip to System 7. If small holes are allowed, this is a five-minute patch at move-out.

    kitchen wall rail system with baskets

    7. Under-Shelf Baskets

    Space it needs: Nothing new — they clip onto your existing cabinet or shelf boards, hanging below them. Baskets typically run 10–16″ wide × 10–12″ deep, and need a shelf board roughly ¾–1″ thick to grip, plus 5–7″ of clear height under the shelf.
    Capacity: Each basket takes packets, wraps, lids, or a bread stash — small things that currently float loose. Two or three baskets can free up a whole shelf.
    Best for: Cabinets that are half-empty air above short items. If you can stack a fist above your cans, you’ve got room for a basket.
    Renter-friendly: Yes — clip on, clip off, no trace.

    under shelf storage baskets

    8. The Portable Island or Kitchen Cart

    Space it needs: Real floor space: 24–36″ wide × 18–24″ deep, plus roughly 36″ of clearance to work around it (less if one side faces a wall). Most stand at counter height, 34–36″ tall.
    Capacity: Shelves or cabinets below hold backstock, small appliances, or bulk items — and you get prep counter on top. This is the only system that adds workspace instead of just storage.
    Best for: Small kitchens short on both storage and counter space — double value for renters who cook a lot.
    Renter-friendly: Yes — it rolls in and rolls out. Locking casters matter if your floor slopes.

    kitchen island cart with storage

    9. The Borrowed Closet Shelf

    Space it needs: One or two shelves of a linen closet, coat closet, or laundry shelf near the kitchen. Shelf boards are usually 12–16″ deep — measure yours, since backstock bins need to match.
    Capacity: Perfectly sized for backstock: duplicates, bulk paper goods, and the big bags that never fit anywhere. Keep daily items in the kitchen; this is your warehouse shelf.
    Best for: Anyone — and it’s often free. The trick is discipline: one or two shelves, labeled bins, backstock only, so it doesn’t become the junk closet with rice in it.
    Renter-friendly: Completely. It’s a shelf you already have, plus a couple of bins.

    large labeled storage bins for backstock

    Which System Fits Your Space?

    SystemSpace it needsCapacityRenter-friendlyBest for
    Slim rolling cart6–14″ floor gapLow–mediumYesThe fridge/stove gap
    Over-door rackA flat door + 4–6″ clearanceLow (small items)YesSpices, packets, wraps
    Slide-out tower5–10″ wide gapMedium (cans/jars)YesOne weird narrow gap
    Freestanding shelf unit24–36″ of wall/floorHigh — a full pantryYes (mind tipping)Empty wall, big shortage
    Pantry cabinet (risers/turntable)One existing cabinetMediumYesZero spare space
    Wall rail system16–32″ of bare wallLow–mediumNo — needs screwsWall space, no floor space
    Under-shelf basketsUnder existing shelvesLowYesHalf-empty cabinet air
    Portable island/cart24–36″ floor + clearanceMedium–highYesStorage + counter space
    Borrowed closet shelf1–2 nearby closet shelvesMedium (backstock)YesFree backstock overflow

    A note on stacking: most no-pantry kitchens end up with one primary system plus one helper — a shelf unit plus a door rack, or a pantry cabinet plus a borrowed backstock shelf. Start with one, live with it two weeks, then add the helper only if a real gap remains.

    Common Mistakes When Creating a Pantry From Nothing

    Choosing by looks instead of measurements. A gorgeous cart that’s an inch too wide for the gap is a coat rack now. Your four measurements outrank every product photo.

    Storing daily items in the “warehouse.” If your coffee lives on a borrowed closet shelf down the hall, the system fails by Friday. Daily drivers stay within arm’s reach of where you cook; only backstock travels.

    Skipping zones because the space is small. Zones matter more in small systems. Front row = this week, back row = backstock applies to a cart tier just as well as a walk-in pantry.

    Blocking the path. Slide-outs, carts, and islands need their swing or pull space every day. If using it annoys you, you’ll stop using it — measure the clearance honestly.

    FAQ

    What’s the cheapest way to create a pantry in a small kitchen?
    The borrowed closet shelf — it’s free, plus a bin or two. Next cheapest: converting one cabinet with a riser and turntable, which usually runs one small purchase and fixes the highest-traffic mess.

    Can I create a pantry in a rental without drilling or damage?
    Yes — six of the nine systems here need no tools at all (carts, door racks, towers, shelf units, cabinet risers, under-shelf baskets). Only the wall rail needs screws. Felt pads and anti-tip care keep doors and floors mark-free.

    How much food can these systems actually hold?
    A freestanding shelf unit holds roughly a small reach-in pantry’s worth. The gap systems (cart, tower, door rack) each hold about one pantry shelf. Most households cover everything with one medium- or high-capacity system plus backstock on a closet shelf.

    What if I have literally no gap, no wall, and one tiny cabinet?
    Then System 5 is your pantry: dedicate that cabinet, add a tiered riser for cans and a turntable for jars, and move backstock to a labeled bin on top of the fridge or a closet shelf. Small and zoned beats big and scattered.

    Should my created pantry hold appliances too?
    Only in the big-item zone, and only if food still fits. Appliances you use weekly can live on the island cart or bottom shelf; the once-a-year ones belong in the closet so your pantry stays a pantry.

    Start With One System — Then Grab the Checklist

    You don’t need a pantry room. You need one measured space, one system that fits it, and zones that tell everything where it lives.

    And if you do have a pantry — or once your created one needs organizing — the free Pantry Reset Checklist walks you through the measure-first list and the 5-zone setup from our Pantry Reset guide, on one page for your phone or cabinet door. The same zones work in every system above, from a door rack to a full shelf unit.

    Join the Room For It All email list and we’ll send you the free Pantry Reset Checklist — plus a short note when a new room-by-room guide goes up. No spam, no daily emails.

    Measure the gap. Pick the system. Zone the shelves. That’s a pantry — wherever it happens to stand.

    Keep going: Pantry Reset and Under-Sink Organization.

  • The Pantry Reset: A Weekend System for a Normal-Sized Pantry

    The Pantry Reset: A Weekend System for a Normal-Sized Pantry

    Disclosure: This post contains affiliate links. If you buy through them, we may earn a commission at no extra cost to you. We only recommend storage we’d use in a normal-sized home — and every product suggestion here comes with the dimensions to check before you buy.

    The Short Answer

    To organize a pantry so it stays organized, don’t start with containers — start with zones. Empty everything, measure your shelves, and sort your food into five zones based on how you actually use it: daily drivers, cooking staples, snacks, backstock, and awkward or bulky items. Give each zone a home that fits your shelf measurements, label what you can see, and leave a little empty space on purpose. Then protect the system with a 15-minute weekly tidy. Zones stay organized; random bins don’t.

    First: Your Pantry Is Not the Problem

    Let’s get something out of the way: your pantry didn’t fail you, and you didn’t fail your pantry.

    Most pantries are “organized” exactly once — the day you move in, when everything goes wherever it fits. After that, real life takes over. Groceries get unloaded in a hurry. The can of beans you know you bought disappears behind the pasta, so you buy another one. And another one.

    That’s not a discipline problem. It’s a system problem: everything in your pantry is stored, but nothing in it has a home.

    This reset fixes that in one weekend, using the shelves you already have. No renovation, no matching-container photoshoot — just a system built for a normal-sized pantry and a normal, busy life.

    Step 1: Empty Everything and Sort Into Piles

    Yes, everything. It feels worse before it feels better, but you can’t build zones around food you can’t see.

    Pull it all out onto the counter or table, then sort into rough piles:

    • Keep and use weekly — the stuff your household reaches for constantly
    • Keep and use sometimes — baking supplies, the good olive oil, holiday ingredients
    • Backstock — duplicates and bulk buys waiting their turn
    • Gone — expired, stale, or the mystery grains nobody will ever cook (be honest; we’ve all got them)

    Check expiration dates as you go. You’ll probably find duplicates you didn’t know you had — that’s the whole point. Wipe the shelves down while they’re empty; it’s the only easy chance you’ll get.

    Don’t buy a single bin yet. Buying before Steps 1 and 2 is the mistake that keeps pantries broken (more on that in Common Mistakes below).

    Step 2: Measure First — Before You Buy Anything

    This is the step most makeovers skip — and why most quietly fall apart. Storage products come in standard sizes; your shelves don’t. A bin one inch too deep sticks out and catches on everything; one too tall becomes dead weight in a closet.

    Grab a tape measure and five minutes:

    The Measure-First Checklist

    Measure thisHow to do itWhy it matters
    Shelf depthFront edge to the back wall, each shelfMost pantry shelves are 12–16″ deep; most bins are 10–14″ deep. This is the #1 fit failure.
    Shelf heightBottom of one shelf to the top of the shelf below itDecides whether canisters, tiered racks, and stackable bins will actually fit standing up.
    Shelf widthSide wall to side wallTwo 12″ bins don’t fit a 23″ shelf. Measure, then do the math before you shop.
    Door swing clearanceOpen the door fully; note anything it nearly hitsDoor-mounted racks add 4–6″ of depth inside the pantry — check the shelves still clear it.
    Inside door dimensionsWidth and height of the flat part of the doorOver-door racks typically run 12–24″ wide; confirm yours fits before ordering.
    Your tallest regular itemMeasure your tallest bottle or box (oils, cereal)Sets the minimum height for one “tall zone” so big items stop wandering.

    Write these numbers in your phone. Every product in this guide lists the dimensions to check against this list. If a product page doesn’t give dimensions, skip it — don’t guess.

    Step 3: Set Up the 5 Pantry Zones

    Now the fun part. You’re not organizing by food type like a grocery store. You’re organizing by how your household uses things — that’s what determines where they should live.

    Zone 1: Daily Drivers (eye level, front and center)

    This is your prime real estate — the shelf you can reach without stretching or crouching. It belongs to the 10–15 items you touch almost every day: coffee, cereal, pasta, the go-to cooking oil, peanut butter.

    What works here: open bins you can grab from without unstacking anything, or a turntable for bottles and jars. Look for bins about 10–12″ deep and 5–6″ tall — deep enough for boxes, low enough to see over. Turntables typically run 10–18″ in diameter; leave an inch of clearance so it spins freely.

    lazy susan turntable, 12 inch
    open pantry bins with handles

    Why: if daily items are easy to grab and easy to put back, the system survives busy weeknights. Friction is what kills organization.

    Zone 2: Cooking Staples (one shelf, grouped by meal logic)

    Flour, rice, sugar, beans, baking basics — the ingredients that get cooked, not snacked. Group them the way you cook: baking together, grains together, canned goods together.

    What works here: a small number of airtight canisters for the staples you buy in bags that never reseal (flour and rice are the usual suspects). Canisters typically run 4–6″ wide, from about 1 quart to a half-gallon — check the height against your Step 2 measurements. For cans, a tiered shelf riser (usually ~12″ wide, 2–3 levels) lets you see the back row instead of playing can roulette.

    airtight canister set
    tiered shelf organizer for cans

    Why: staples are heavy and long-lived. They don’t need to be pretty; they need to be findable and sealed. And no, this zone does not mean decanting everything you own — see Common Mistakes.

    Zone 3: Snacks (the high-traffic zone)

    Snacks get their own zone, full stop. They’re the highest-traffic items in most homes, grabbed by the smallest and least careful household members — and if they don’t have a dedicated home, they will colonize every other shelf.

    What works here: one or two clear bins with handles, roughly 12″ long × 6″ wide × 5″ tall — one for sweet, one for salty, or one per kid. Clear matters: when people can see snacks running low, they add them to the list instead of tearing the pantry apart looking for more.

    clear stackable pantry bins

    Why: containing the chaos in one zone protects the other four. A snack bin can look like a tiny storm and the pantry still works.

    Zone 4: Backstock (top shelf or hardest to reach)

    Duplicates, bulk buys, the extra jar of sauce from the sale. This is your pantry’s warehouse, and it belongs on the shelf you reach least — usually the top.

    What works here: bigger, sturdier bins, around 14–16″ deep — one for “next up” food, one for paper goods or extras. Label this zone clearly: backstock you forget about is just future expired food.

    large storage bins for backstock

    Why: the golden rule of backstock is shop your pantry first. When a daily driver runs out, you check Zone 4 before it goes on the grocery list. That’s where this system starts paying you back.

    Zone 5: Awkward and Big Items (bottom shelf or floor)

    The economy-size vinegar. The stockpot that lives in the pantry because there’s nowhere else. Bulky cereal boxes, the blender, bags of potatoes. Every pantry has them, and they wreck systems because they fit nowhere.

    What works here: give them the bottom shelf or a floor spot on purpose. A low rolling cart (typically 17–24″ wide) corrals bottles and heavy items and pulls out when you need the thing at the back. A sturdy floor bin handles bags that stand up badly.

    rolling under-shelf cart

    Why: big items stored “wherever they fit” end up everywhere. Give them an assigned floor zone and they stay in their lane — literally.

    Step 4: Labels and Visibility Rules

    You don’t need a label maker and a free afternoon. You need three rules:

    1. See it or forget it. Front rows should never hide back rows. If you can’t see it, it effectively doesn’t exist — that’s how you ended up with four cans of chickpeas.
    2. Label the zone, not every item. A bin labeled “Snacks” works forever. A jar labeled “Organic Quinoa, March” works until April. Zone labels survive; inventory labels don’t.
    3. Newest goes in back. New groceries go behind the older items in each zone. Ten seconds now, no expired surprises later.

    Masking tape and a marker are genuinely fine. Printed labels are a want, not a need — the system doesn’t care.

    Step 5: The 15-Minute Weekly Reset

    Here’s what makes this a system instead of a one-time cleanup: a tiny weekly habit, tied to something you already do — right before the grocery list, or while Sunday coffee brews.

    Set a timer and do only this:

    • Front and center (3 min): pull daily drivers back to the front of Zone 1.
    • Shop the backstock (3 min): check Zone 4 for anything to move down or put on the list.
    • Scan for casualties (4 min): toss anything stale, combine the two half-empty cracker boxes, wipe the one spill you can see.
    • List it (5 min): note what each zone is out of. This is your grocery list now.

    That’s it. Fifteen minutes a week stands between “organized pantry” and “that one good month we had.” You’re maintaining zones, not staging a photo.

    The Same Reset at Three Budgets

    You can run this system at any budget, because the system is the zones — products are just helpers. Buy for the zone you’re fixing first, not all five at once.

    Around $25 — the starter reset
    A label solution (tape and marker, or a basic label pack), two or three simple bins for the snack zone, and one turntable for daily-driver bottles. This alone fixes the highest-traffic mess in most pantries.

    pantry labels
    basic pantry bin set

    Around $75 — the working reset
    Everything above, plus a tiered shelf riser for cans, a door-mounted rack if your door measurements allow it, and a small set of airtight canisters for flour and rice. Zones 1, 2, and 3 now have proper homes.

    over door pantry rack

    Around $150 — the full reset
    Everything above, plus clear bins for every zone, a second turntable, large backstock bins, and a rolling cart for the awkward-items zone. The complete system, measured and fitted to your shelves.

    Notice what’s not required at any tier: a full set of identical designer canisters. See the next section.

    Common Mistakes That Quietly Wreck a Pantry

    Buying bins before measuring. The most expensive mistake, and the most common. A bin haul bought on vibes produces a shelf of almost-fits and a donation pile. Measure first (Step 2), buy second — every time.

    Decanting everything. Pouring every dry good into a jar feels organized for exactly one grocery cycle. Then you’re maintaining a second, hidden pantry of half-empty original bags, and refilling jars becomes a chore you avoid. Decant the two or three staples in un-resealable bags; leave the rest in their packaging, in their zone.

    The matching-container trap. Identical containers hide what’s inside, come in sizes chosen for looks instead of your shelves, and one broken lid orphans the set. Fit beats matching — your zones can be a lovable mix of shapes as long as each fits its shelf and its job.

    Filling every inch. A pantry packed to 100% has no landing spot for new groceries, so they get shoved wherever — and the drift begins. Aim for about 85% full. Empty space is a feature, not a failure.

    Organizing for a household you don’t have. If nobody bakes, baking doesn’t get a prime shelf. If the kids only eat three snacks, don’t stock nine. Organize around your real habits from Step 1’s sort — not the ones you feel you should have.

    FAQ

    How long does a pantry reset take?
    Plan on 2–4 hours total, and it’s fine to split it: sort and measure on Saturday, set up zones on Sunday. Measuring alone takes about five minutes and saves the most money.

    Should I decant everything into matching jars?
    No. Decant only staples that come in bags that don’t reseal — usually flour, rice, and sugar. Everything else keeps its original packaging and lives in its zone. Less uniform, works better.

    What if my pantry is really just one deep cabinet?
    The zones still work — they just stack vertically instead of spreading across shelves. Daily drivers in front, backstock in back (in a pull-out bin so it stays reachable). Our upcoming deep-shelf guide goes all-in on exactly this problem.

    How do I stop the snack zone from taking over?
    Give snacks a bin with hard edges — literally. One bin, and the rule is snacks live in the bin or they don’t come in the house. When the bin is full, that’s the inventory. Restock it from backstock, not from the store.

    How often should I redo the whole reset?
    With the 15-minute weekly habit, a full reset becomes rare — a light seasonal version (re-check dates, re-sort zones) once or twice a year is plenty. If the habit lapses for a month, no guilt: just run the 15 minutes again and the system comes back.

    Get the Free Pantry Reset Checklist

    Everything in this guide, condensed into a one-page checklist for your phone or the inside of the pantry door:

    • The measure-first checklist with blanks for your shelf depth, height, and door dimensions
    • The 5 zones with what belongs in each, as a quick sorting reference
    • The expiration-date sweep list from Step 1, so nothing gets sorted twice
    • The 15-minute weekly reset as a four-step routine you can check off
    • A “buy later” list by zone and budget tier, so you never impulse-buy a bin that doesn’t fit

    Drop your email below and we’ll send it straight to your inbox. No spam, no daily emails — just the checklist, plus a short note when a new room-by-room guide goes up.

    Join the Room For It All email list and we’ll send you the free Pantry Reset Checklist — plus a short note when a new room-by-room guide goes up. No spam, no daily emails.

    Measure first. Zone second. Buy third. That’s the whole secret — and now your pantry has a system instead of a hope.

    Keep going: No Pantry Storage and Fridge Zones.