Disclosure: This post contains affiliate links. If you buy through them, we may earn a commission at no extra cost to you. We only recommend storage we’d use in a normal-sized home — and every product suggestion here comes with the dimensions to check before you buy.
The Short Answer
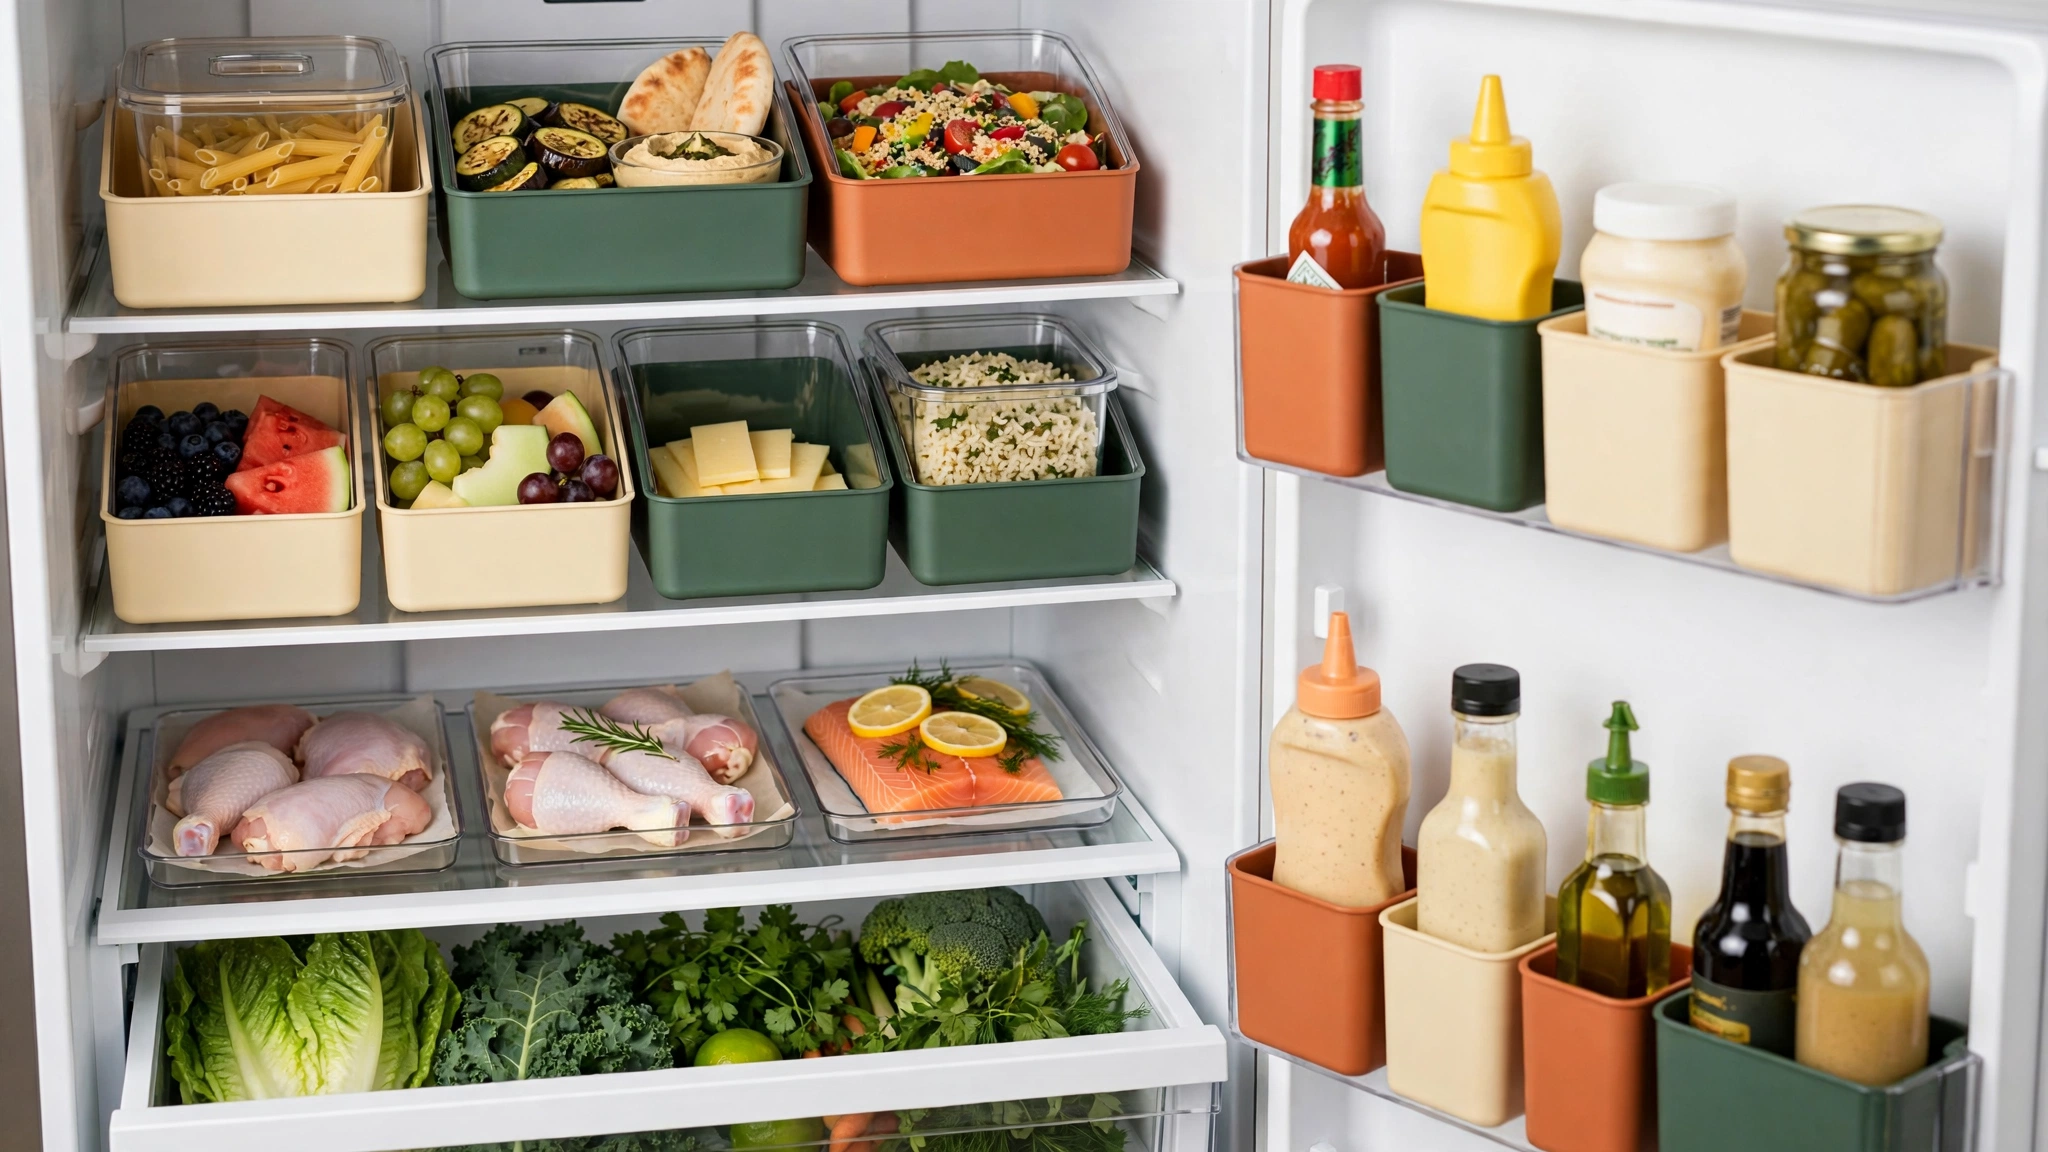
To stop losing food in your fridge, organize it by temperature, not by food type. Your fridge is not one cold box — it’s a set of temperature zones. The door is the warmest spot, so it belongs to condiments only. Upper shelves hold ready-to-eat food and leftovers. Raw meat goes on the lowest shelf, contained in a bin so it can’t drip. Add one clear “eat me first” bin for anything on its last days, label leftovers with the date, and run a 10-minute sweep once a week. Food doesn’t get lost because you’re careless — it gets lost because it was invisible.
First: You’re Not Wasting Food Because You’re Lazy
Every fridge has a graveyard. The bag of salad gone soft behind the milk. The half onion that dried into a science project. The leftovers you fully intended to eat — on the day they quietly passed the point of no return.
Here’s the thing: almost none of that is a willpower problem. It’s a visibility problem. Food in the back of a deep shelf, in an opaque container, behind three other things, effectively doesn’t exist. You can’t eat what you can’t see, and you definitely can’t eat what you forgot you bought.
The fix isn’t a bigger fridge or a stricter personality. It’s zones — putting each kind of food where your fridge’s temperatures say it should live, in containers you can see through, with one dedicated bin for the food that needs eating now.
Know Your Fridge’s Real Temperature Zones
Your fridge has warm and cold spots whether you use them or not. The only question is whether the right food ends up in each one.
First, the baseline: your fridge should be set at or below 40°F (4°C), the standard food-safety recommendation. If your fridge doesn’t show the temperature, an inexpensive appliance thermometer takes the guessing out of it.
fridge thermometer
Then, the zones, warmest to coldest:
- The door is the warmest, most temperature-buffeted spot in the whole fridge. Every opening swings it toward room temperature.
- The upper shelves are moderately cold and the most visible real estate you have.
- The lower shelves are the coldest part of the main compartment.
- The crisper drawers can be set more or less humid, which makes them right for produce — more on that below.
Every zone assignment in this guide follows from those four facts.
The Zone System
Zone 1: The Door — Condiments Only
Ketchup, mustard, hot sauce, pickles, jams, bottled dressings. These are built to handle temperature swings — they’re acidic, salty, or sugary enough to be forgiving, and they’re the foods that can survive the door.
What does not belong here, even though the fridge has a cute little compartment shaped for it: eggs and milk. The egg door is a marketing feature, not a food-safety feature. Eggs and milk belong on a shelf inside the fridge, where the temperature is colder and steadier.
What works here: the built-in door shelves are fine as-is. A slim turntable (most run 10–12″ in diameter) on a shelf inside can handle the condiment overflow if your door is packed — measure your shelf depth first, as always.
Why: every time a perishable gets demoted to the door, it ages faster. Keeping the door condiment-only removes a whole category of quiet spoilage.
Zone 2: Upper Shelves — Ready-to-Eat and Leftovers
This is your prime viewing area, so it belongs to food that needs attention: leftovers, ready-to-eat items, yogurt, cheese, drinks, the deli meat for this week’s lunches.
What works here: clear, stackable containers for leftovers — square ones use the space better than round. Typical sets run 4–7″ wide in stackable sizes; measure your shelf height (usually 8–12″ between shelves) before buying a tall stack. Keep this zone to one or two containers deep. The moment leftovers stack three deep, the back ones are already lost.
Why: leftovers have the shortest clock in the fridge — generally 3–4 days for cooked food. They earn the most visible shelf precisely because they have the least time.
Zone 3: The “Eat Me First” Bin — Your Anti-Waste Engine
This is the single highest-impact change in this entire guide: one clear bin, at eye level, holding only the food that needs to be eaten in the next day or two.
The half pepper. The opened can of beans. The yogurt expiring Thursday. The leftover rice from Monday. When something enters its final days, it moves into the bin. The household rule is simple: check the bin before you cook, snack, or order takeout.
What works here: one clear bin with handles, roughly 12–14″ long × 6–8″ wide × 4–6″ tall — big enough for a few items, small enough that it can’t become a second graveyard. Clear is non-negotiable; an opaque bin is just a smaller place to lose food.
clear fridge bin with handles
clear stackable fridge bins
Why: it converts “we should use that up” (vague, forgettable) into a physical place you look (specific, hard to miss). Most households find this one bin does more for food waste than every other tip combined.
Zone 4: Lower Shelf — Raw Proteins, Contained
Raw meat, poultry, and seafood go on the lowest shelf, full stop. If a package leaks — and eventually one will — gravity works for you instead of dripping contamination onto everything below it.
What works here: one washable, low-walled bin or tray that lives permanently on that shelf, roughly 14–16″ long × 9–10″ wide × 2–3″ tall — think a shallow tray that contains drips, not a deep bucket. Packages go in the tray, never loose on the shelf.
washable fridge tray for raw meat
Why: containment is the whole point. A drip inside a tray is a 30-second rinse. A drip across a shelf and everything under it is a full fridge clean-out and a pile of thrown-out food.
Zone 5: Crisper Drawers — Humidity, in Plain Language
Most crispers have a little slider marked high/low humidity, and almost nobody touches it. Here’s the translation:
- High humidity (slider closed): traps moisture. Use it for leafy greens, herbs, and anything that wilts — lettuce, spinach, cilantro.
- Low humidity (slider open): lets gases escape. Use it for fruits and anything that rots or ripens fast — apples, pears, peppers.
Can’t remember which is which? Remember “greens want a rainforest, fruits want a breeze.”
Why: produce is the most expensive thing most of us throw away. The drawers are already the right tool — they just need to be assigned instead of treated as random overflow.
Measure First: Bins That Fit Your Actual Fridge
The fridge aisle of every store is full of beautiful bin sets sized for somebody else’s refrigerator. Fridges vary more than almost any other storage space in the house — measure yours before you buy a single bin.
| Measure this | How to do it | Why it matters |
|---|---|---|
| Shelf depth | Front edge to back wall, each shelf | Interior depth is commonly 14–20″ once door bins are counted — and it’s the #1 reason bin sets don’t fit. |
| Shelf height | Shelf top to the shelf or drawer above it | Decides whether stackable bins and tall bottles both survive. |
| Shelf width | Side wall to side wall | Two 8″ bins don’t fit a 15″ shelf next to a gallon of milk. Do the milk math. |
| Crisper drawer interior | Inside length, width, and height | Produce organizers only help if the drawer still closes. |
| Door bin width and depth | Inside each door shelf | Slim bottles and jars fit here; gallon jugs usually don’t. |
Write the numbers in your phone, same as the pantry. If a bin’s product page doesn’t list dimensions, skip it.
Clear-Bin Strategy: What Goes in Bins — and What Doesn’t
Bins earn their place in the fridge, but selectively. The rule: bins are for corralling categories, not for storing everything.
Belongs in bins:
- The “eat me first” bin (Zone 3) — the non-negotiable one
- Raw proteins, in their containment tray (Zone 4)
- Small loose items that roll, tip, or migrate — cheese sticks, yogurt tubes, sauce packets, snack-size items
- One category per bin, labeled with the zone, not an inventory list
Does NOT belong in bins:
- Tall bottles and gallon jugs — a bin around a milk jug just adds a step between you and the milk
- Anything you grab daily with one hand — if a bin slows down a daily habit, the bin will end up abandoned on a counter
- Big produce — melons, cabbage heads, and corn take bin space out of all proportion to their benefit; they can live loose in the crisper
- Leftovers in opaque containers — bin or no bin, if you can’t see it, it’s already on its way out
The Two Habits That Keep the System Alive
1. Label with a date. Leftovers get a piece of masking tape with the day they were cooked — “Tue — chicken soup.” Not the day you hope to eat it, not a use-by guess: the cook date. Then the 3–4 day rule does the deciding, and nobody has to perform the sniff test and a small act of faith. Tape and a marker live in the kitchen, near the containers, or this habit dies by Friday.
2. Newest goes in back. Same rule as the pantry, for the same reason: the older item should always be the one you reach first.
masking tape and label set for food containers
The 10-Minute Weekly Fridge Sweep
Tie this to trash day — it’s the perfect anchor, because anything you find can go straight out to the curb instead of sitting in your kitchen trash all week.
Set a timer for 10 minutes and do only this:
- Bin check (3 min): open the “eat me first” bin. Tonight’s dinner plan now includes whatever is in it. Anything past saving goes in the trash bag in your hand.
- Date scan (3 min): read the tape labels on the leftovers. Anything at day 4 or beyond goes out. No debates, no sniff tests — the date decides.
- Drip and tray check (2 min): peek at the protein tray and wipe the one spill you can see. Two minutes now beats a full shelf scrub later.
- Reset the zones (2 min): milk and eggs back inside off the door shelf if they wandered, condiments back to the door, leftovers front and center on the upper shelf.
That’s it. Ten minutes, once a week, timed to the one day the trash leaves anyway. Your fridge stops being an archive and goes back to being a tool.
FAQ
Where is the coldest part of the fridge?
The lower shelves, toward the back — that’s why raw proteins live on the lowest shelf (in a containment tray, so drips can’t reach anything else). The warmest spot is the door, which is why it belongs to condiments only.
Should eggs and milk really not go in the door?
Right — despite the egg-shaped door compartment many fridges come with. Eggs and milk keep best at a cold, steady temperature, which means a shelf inside the fridge, not the door that swings into room air a dozen times a day.
How long do leftovers actually last?
As a general rule, cooked leftovers are good for 3–4 days in a fridge kept at or below 40°F. That’s exactly why the date-tape habit matters: “Tuesday” written on the lid is a decision you don’t have to remake on Friday.
How many fridge bins do I actually need?
Usually two to start: the “eat me first” bin and the protein containment tray. Add a third for small loose items if they’re genuinely migrating. More bins than that usually means the bins are organizing the bins.
My fridge is small — does zoning still work?
Yes, the zones just get smaller and share shelves: condiments stay in the door, leftovers and ready-to-eat share the top shelf, proteins stay lowest and contained. The “eat me first” bin matters more in a small fridge, not less — there’s nowhere for food to hide except behind other food.
Keep Going: The Kitchen System
The fridge is one half of the fresh-food problem; the pantry is the other. If you haven’t yet, our Pantry Reset guide sets up the same zone logic for your dry goods — including the same measure-first checklist habit — and its free checklist pairs with the sweep in this guide: pantry reset before the grocery trip, fridge sweep on trash day. Two small habits, one kitchen that stops eating your grocery budget.
fridge organization starter set
See it, date it, zone it. That’s the whole system — and the graveyard shift is officially over.
Keep going: Pantry Reset.
Leave a Reply